This article introduces you to the usage of Moodle. It covers the installation on a dedicated school server, as well as the users authentication with LDAP or Single-Sign-On. If further integration packages are needed, like loading classes from the LDAP or using the Microsoft Windows authentication for already logged in users, feel free to contact Univention for assistance.
This Article has been successfully tested with the Moodle 3.6.4.
Prepare UCS
It’s important that every user, that should use Moodle, must have an e-mail address. If currently no user has an e-mail address, install the Mailserver component from the App center to manage an e-mail domain and assign e-mail addresses to users.
Prerequisites
This section will cover the preparation and installation of Moodle on the system. Please make sure that every command is executed as root user.
To install necessary packages, execute the following command:
univention-install univention-mysql libapache2-mod-php php php-common php-json php-xml php-cli php-curl php-readline php-mbstring php-intl php-mysql php-ldap php-xmlrpc php-soap php-zip php-gd
To use Moodle effectively, it is recommended to raise the maximum size for uploads, e. g. 20 MB, to provide small programs to students. The changes must be done manually in the /etc/php/7.0/apache2/php.ini file:
post_max_size = 20M
upload_max_filesize = 20M
For the changes to take effect, the Apache webserver must be reloaded:
systemctl reload apache2.service
Moodle furthermore needs three MySQL global variables set to provide full UTF-8 support. (Read more here for details)
You can easily set the variables innodb_file_format, innodb_file_per_table and innodb_large_prefix by using the following UCR command and afterwards restarting the MySQL Service:
ucr set \
 mysql/config/mysqld/innodb_file_format="Barracuda" \
 mysql/config/mysqld/innodb_file_per_table=1 \
 mysql/config/mysqld/innodb_large_prefix=1

systemctl restart mysqld.service
Installing Moodle
This section handles the basic installation and configuration of Moodle and how to automatically delete users in Moodle that are not existent in the authentication service anymore.
Create a database
Hint: It is recommended to create a Moodle user with appropriate privileges on the Moodle database.
Use the following commands to setup a MySQL User and Database with UTF8 default encoding. The Moodle MySQL User password will be saved in file /etc/mysql-moodle.secret and used later during the install.
Generate your database password according to your machine password policy and save it in a secret file
eval "$(ucr --shell search machine/password/length machine/password/complexity)"
if [ -z "$machine_password_length" ]; then machine_password_length=20; fi
if [ -z "$machine_password_complexity" ]; then machine_password_complexity="scn"; fi
moodle_db_password="$(pwgen -1 -${machine_password_complexity} ${machine_password_length} | tee /etc/mysql-moodle.secret)"
Create your moodle database and moodle database user
mysql -u root --password=$(cat /etc/mysql.secret) -e \
"CREATE DATABASE moodle DEFAULT CHARACTER SET utf8mb4 COLLATE utf8mb4_unicode_ci;
GRANT SELECT,INSERT,UPDATE,DELETE,CREATE,CREATE TEMPORARY TABLES,DROP,INDEX,ALTER ON moodle.* TO 'moodle'@'localhost' IDENTIFIED BY '$moodle_db_password';"
Download Moodle code
The next step is, to download and extract Moodle. You can use the following script to download the Moodle version 3.6.4:
tmpdir=$(mktemp -d) # A temporary working directory

# Download Moodle and extract it
wget --show-progress -O $tmpdir/moodle-3.6.4.tgz https://download.moodle.org/download.php/direct/stable36/moodle-3.6.4.tgz
tar -xvzf $tmpdir/moodle-3.6.4.tgz -C /var/www/

# Set the correct folder and file permissions (This might take a few seconds)
chown -R www-data:www-data /var/www/moodle
find /var/www/moodle/ -type f -exec chmod 640 {} \;
find /var/www/moodle/ -type d -exec chmod 750 {} \;

# Create Moodle's data directory
mkdir /var/moodledata
chown -R www-data:www-data /var/moodledata
find /var/moodledata -type f -exec chmod 600 {} \;
find /var/moodledata -type d -exec chmod 700 {} \;

# Remove the temporary working directory again
rm -R $tmpdir

# Secure the Moodle directories by disabling apache2 directory listing
printf "<Directory /var/www/moodle/>
\tOptions -Indexes
\tAcceptPathInfo On
</Directory>" > /etc/apache2/conf-available/moodle.conf
a2enconf moodle
systemctl reload apache2
In order for Moodle to be able to remove users from its database that were deleted in the authentication service, a cronjob must be defined using UCR (read more here)
ucr set \
cron/moodle/command='php /var/www/moodle/admin/cli/cron.php' \
cron/moodle/time='*/10 * * * *'
Now the Moodle service can be reached by opening the web page in a webbrowser:
https://<server>/moodle
You can now either install Moodle using the web configurator or continue on the command line.
Install Moodle from the Command Line
Use the following script, if you want to continue using the command line for the Moodle installation:
(Note: Don’t forget to set the variables on the script top first. You will be able to confirm all given values once more during installation)
# Please set the basic data of your moodle and admin here
moodle_name_full="<YOUR_SITE_NAME>"
moodle_name_short="<YOUR_SITE_NAME_SHORT>" # Best just one word
moodle_summary="<YOUR_FRONT_PAGE_SUMMARY>"
moodle_language="en" # Installation and default site language by language code
moodle_web_address="https://slave1.cool-solutions.intranet/moodle" # It is important that this web address is the address that users will enter into the address bar of their browser to access Moodle. It should also begin with the https protocol.
admin_username="Admin" # Don't use an username already present inside your LDAP     directory
admin_email="<YOUR_ADMIN_MAIL_ADDRESS>"

# Install Moodle
php /var/www/moodle/admin/cli/install.php \
 --chmod=0750 \
 --lang="$moodle_language" \
 --wwwroot="$moodle_web_address" \
 --dataroot="/var/moodledata" \
 --dbtype="mariadb" \
 --dbhost="localhost" \
 --dbsocket=1 \
 --dbname="moodle" \
 --dbuser="moodle" \
 --dbpass="$(cat /etc/mysql-moodle.secret)" \
 --fullname="$moodle_name_full" \
 --shortname="$moodle_name_short" \
 --summary="$moodle_summary" \
 --adminuser="$admin_username" \
 --adminemail="$admin_email"
Note that the generated Config-File will most likely have the wrong file permissions assigned, due to the command execution by ‘root’. Use the following commands, if the Moodle web page returns a HTTP 500 error or ‘Unable to save the cache config to file.’ code:
chown www-data:www-data /var/www/moodle/config.php
chmod 640 /var/www/moodle/config.php
chown -R www-data:www-data /var/moodledata
find /var/moodledata -type f -exec chmod 600 {} \;
find /var/moodledata -type d -exec chmod 700 {} \;
You are finished. Moodle can now be configured more fine-grained using the Site administration. Use the Moodle Docs for this page. We additionally recommend configuring the LDAP OR SAML Single-Sign-On Authentication using one of our descriptions below.
You can optionally add Moodle as an Application entry to your Univention portal. Follow the description inside the UCS 4.4 manual to achieve this.
Alternative: Install Moodle using the web browser
You can reach your new Moodle service on the following web page to alternatively install Moodle using your webbrowser:
https://<server>/moodle
We will now install Moodle following the given instructions. After choosing your language, please confirm the given paths.
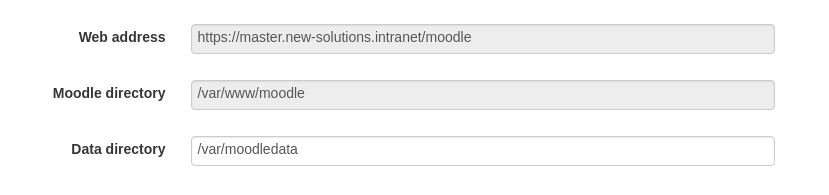
It is important, that the shown web address is the address that users will enter into the address bar of their browser to access Moodle. It should also start with the https protocol. You can adjust the shown web address by changing the address you are currently using in your browser to access the web based installer.
Please also confirm that the shown data directory is /var/moodledata.
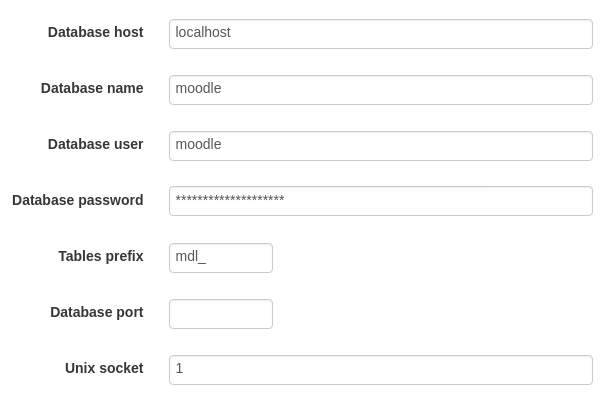
As next step we will configure our database settings. Use the following settings after choosing “MariaDB (native/mariadb)” as your database driver (you can find your password inside the file /etc/mysql-moodle.secret):
After accepting the Moodle license, copyright conditions and confirming the server checks once more, Moodle will install itself.
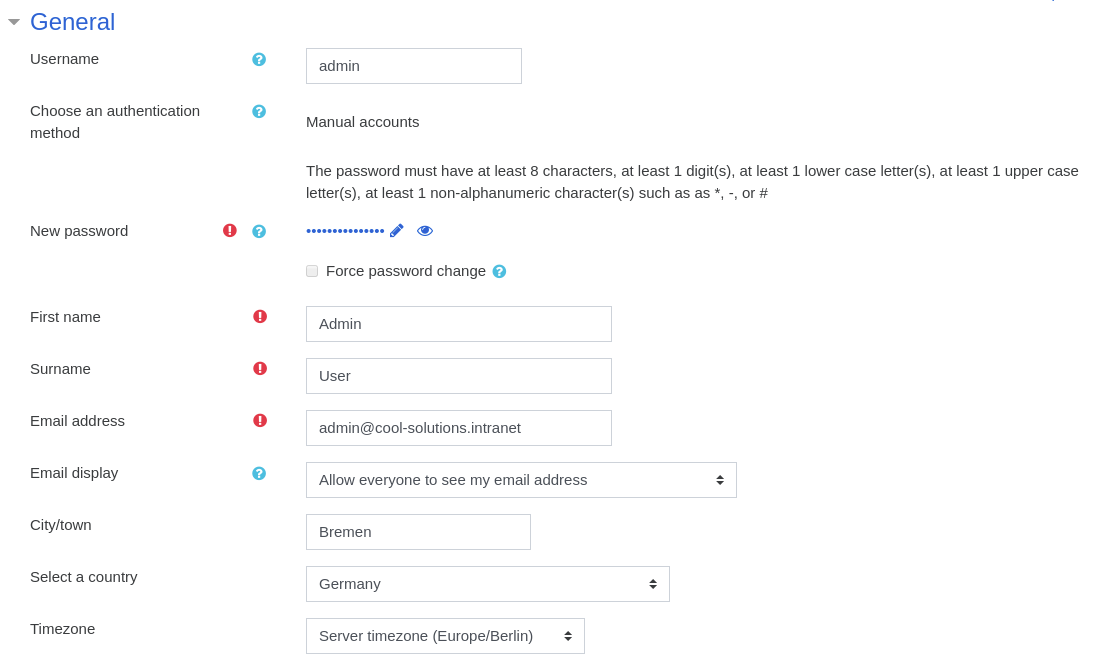
We will create a local Moodle admin in the next window.
It is discouraged using an Username already present inside your LDAP directory, as these will be imported automatically at a later point.
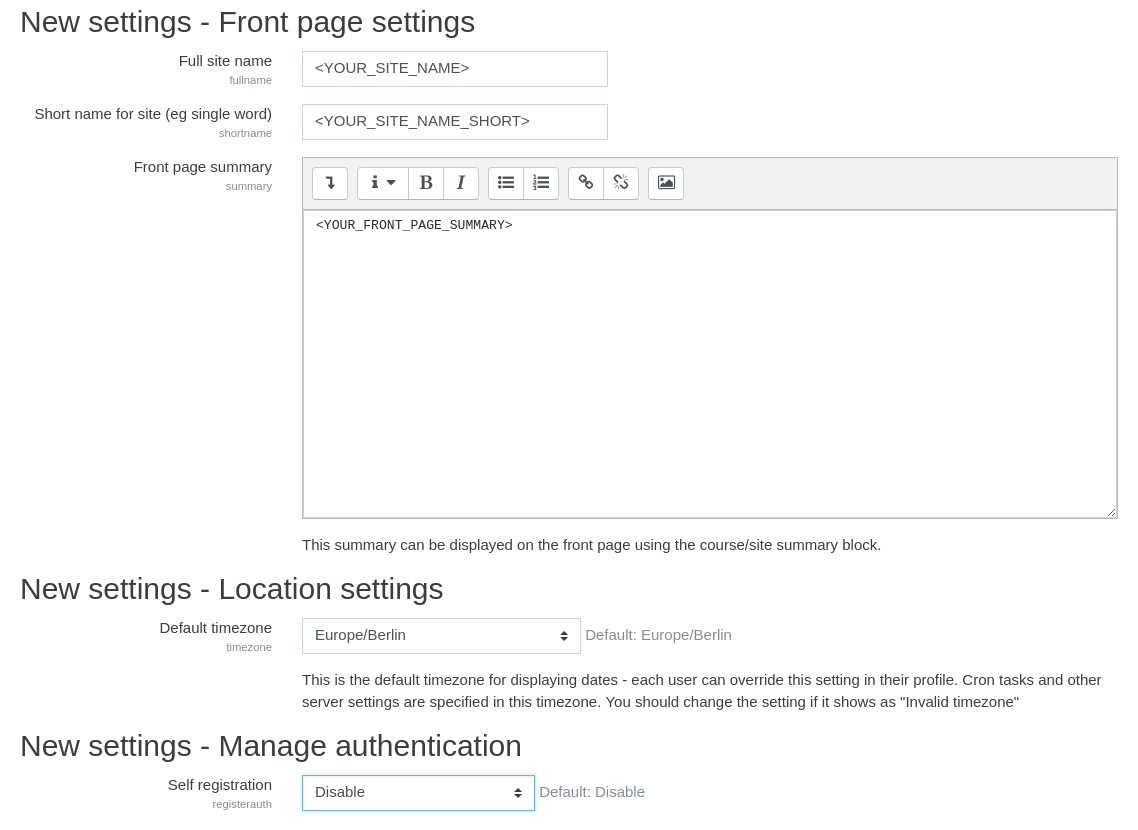
Now we will set the Moodle service settings. These can be set at your will or can be kept on the default values.
As the final step, Moodle offers you the option to register your Moodle service with them. You can optionally skip this step.
Moodle can be configured more fine-grained using the Site administration. Use the Moodle Docs for this page. We additionally recommend configuring the LDAP OR SAML Single-Sign-On Authentication using our descriptions below.
You can optionally add Moodle as an Application entry to your Univention portal. Follow the description inside the UCS 4.4 manual to achieve this.
Authentication
We have created two articles to describe user authentication with Moodle. You can either decide to use LDAP, which requires direct access to an LDAP system for the Moodle server, or use a Single-Sign-On implementation based on the SAML 2.0 protocol. Both offer certain advantages and disadvantages.
LDAP Authentication
SAML Single-Sign-On Authentication
Enrolment
We have created an article to describe automatic mapping of LDAP groups to the courses. The used plugin can also handle the student memberships of courses, if LDAP authentication is used.
LDAP Enrolments
References
- Moodle - https://moodle.org/
- Moodle 3.6 Documentation - New features - MoodleDocs
- Moodle Security recommendations - Security recommendations - MoodleDocs
Further links
- Moodle Installation - Installing Moodle on Debian based distributions - MoodleDocs