How to configure a DHCP switch for UEFI and non-UEFI boot
This article is based on UCS@School mit OPSI: UEFI-PXE im LDAP korrekt eingerichtet? - #2 by birkefeld
Environment
- A single network configured with a single DHCP server already serving IP addresses.
- A DHCP service is configured in the UCS management system.
- opsi is installed in the environment and UEFI support extension is activated.
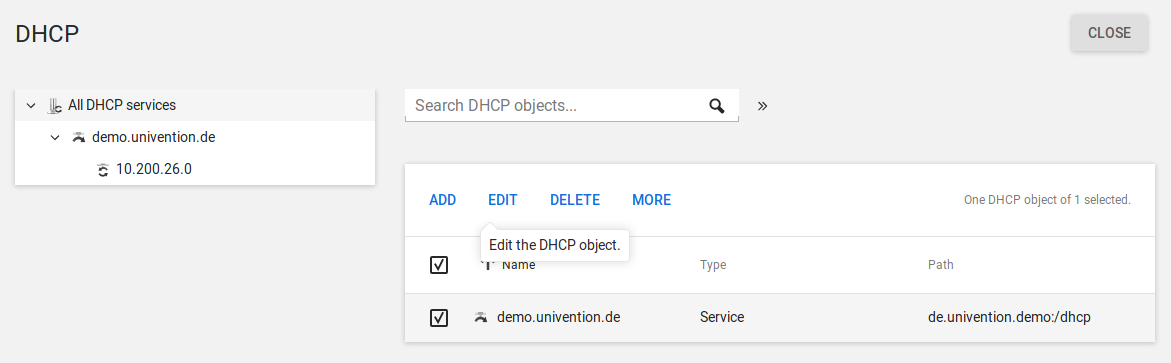
Step 1: Select DHCP service and edit it
In the UCS management system in the module DHCP select the desired DHCP service and edit it.
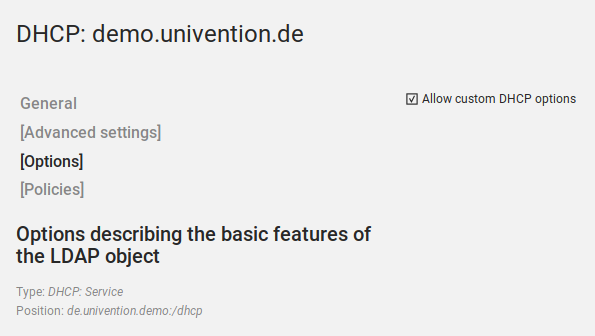
Step 2: Activate Custom Options
In the DHCP service, go to the Options tab and activate the checkbox Allow custom DHCP options.
Step 3: Add UEFI switch
On the tab Advanced settings add the UEFI switch below the DHCP Statements.
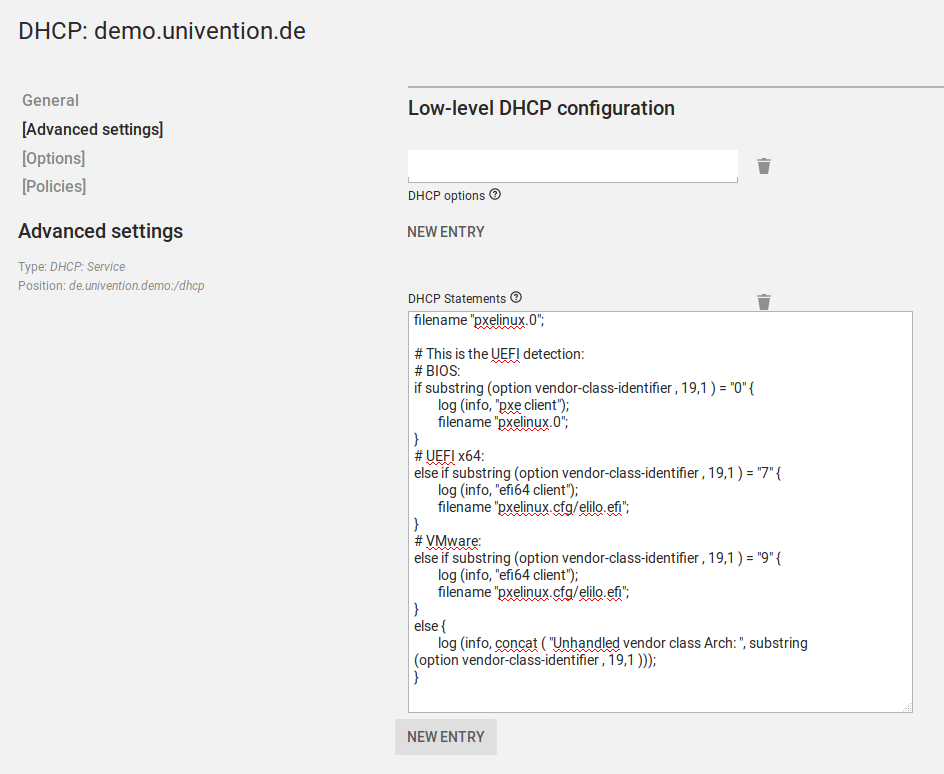
The code below can simply be copied. It is based on the documentation for opsi.
# filename is relative to /var/lib/univention-client-boot/
filename "pxelinux.0";

# This is the UEFI detection:
# BIOS / Legacy:
if substring (option vendor-class-identifier , 19,1 ) = "0" {
        log (info, "pxe client");
        filename "pxelinux.0";
}
# UEFI x64:
else if substring (option vendor-class-identifier , 19,1 ) = "7" {
        log (info, "efi64 client");
        filename "pxelinux.cfg/elilo.efi";
}
# VMware:
else if substring (option vendor-class-identifier , 19,1 ) = "9" {
        log (info, "vmware efi client");
        filename "pxelinux.cfg/elilo.efi";
}
else {
        log (info, concat ( "Unhandled vendor class Arch: ", substring
(option vendor-class-identifier , 19,1 )));
}
Optional Step 4: Multiple locations
The DHCP switch has to be added to the DHCP services at every location with UEFI clients. Alternatively, it can also be added to DHCP subnets instead of the DHCP service.
Step 5: Tell opsi about UEFI clients
Furthermore, opsi has to be informed that a client uses UEFI. The respective option has to be set in opsi-configed and the correct TFTP boot options will be used.
Via command line
Step 1: Save DHCP statement to a file
Save the DHCP statement from Step 3 above to a text file, for example to /tmp/dhcp-switch.txt.
Step 2: Assign the switch to a DHCP service or subnet
Once the DHCP statement for the UEFI switch is saved, it can be assigned to DHCP. This can either be assigned to a DHCP service (as described above) and would affect all subnets. Or you can assign it a single DHCP subnet.
Add DHCP statement to the DHCP service
udm  dhcp/service modify --dn "$DN-of-the-service" \
    --set statements="$(cat /tmp/dhcp-switch.txt)"
Add DHCP statement to subnet
udm  dhcp/subnet modify --dn "$DN-of-the-subnet" \
    --set statements="$(cat /tmp/dhcp-switch.txt)"
see also: