How to:
Migrate from simpleSAMLphp to Keycloak
Starting with UCS 5.2 the Keycloak app replaces the apps SimpleSAMLphp and OpenID Connect Provider as the default identity providers in UCS. The reason for this change is that Keycloak has many advantages in terms of features, configurability, and maintainability over the alternatives, for example, Keycloak provides OIDC and SAML endpoints in one component.
This article describes the migration of the single sign-on authentication from simpleSAMLphp to Keycloak for the UCS Portal.
Install Keycloak
Hint
Keycloak automatically creates SAML SPs (clients in Keycloak) for every UCS Portal server that is reachable / turned on
If server in the domain are switched off, they can be added in Keycloak manually as described here
or automatically via the Keycloak join script50keycloak.inst
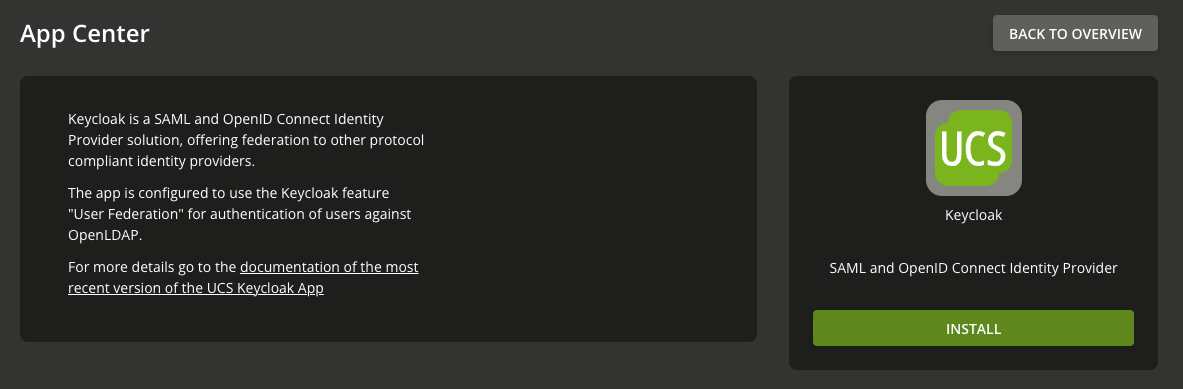
Install Keycloak via the AppCenter
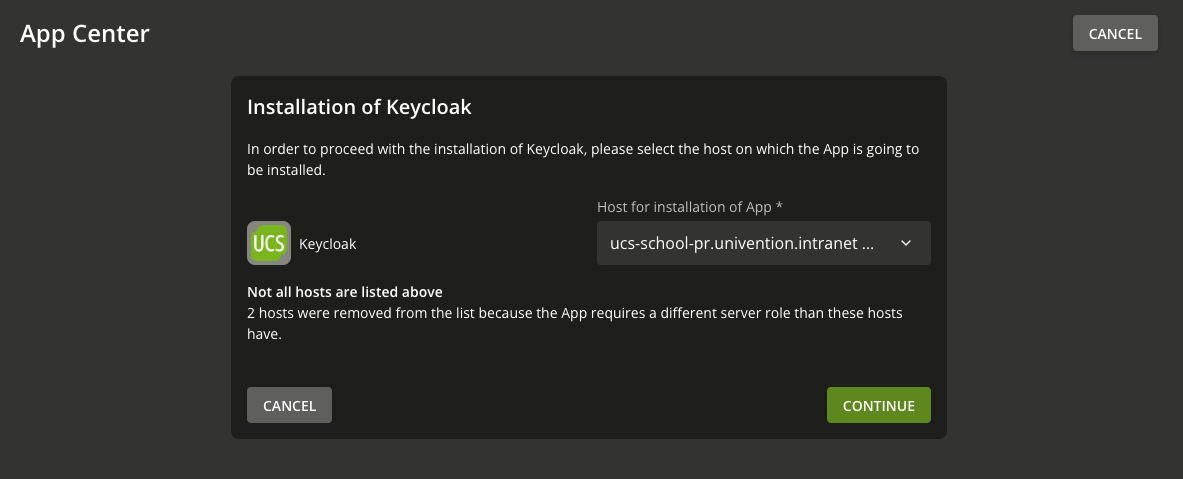
Install Keycloak via the AppCenter. During the installation process you will have to tell ucs on which host keycloak should be installed.
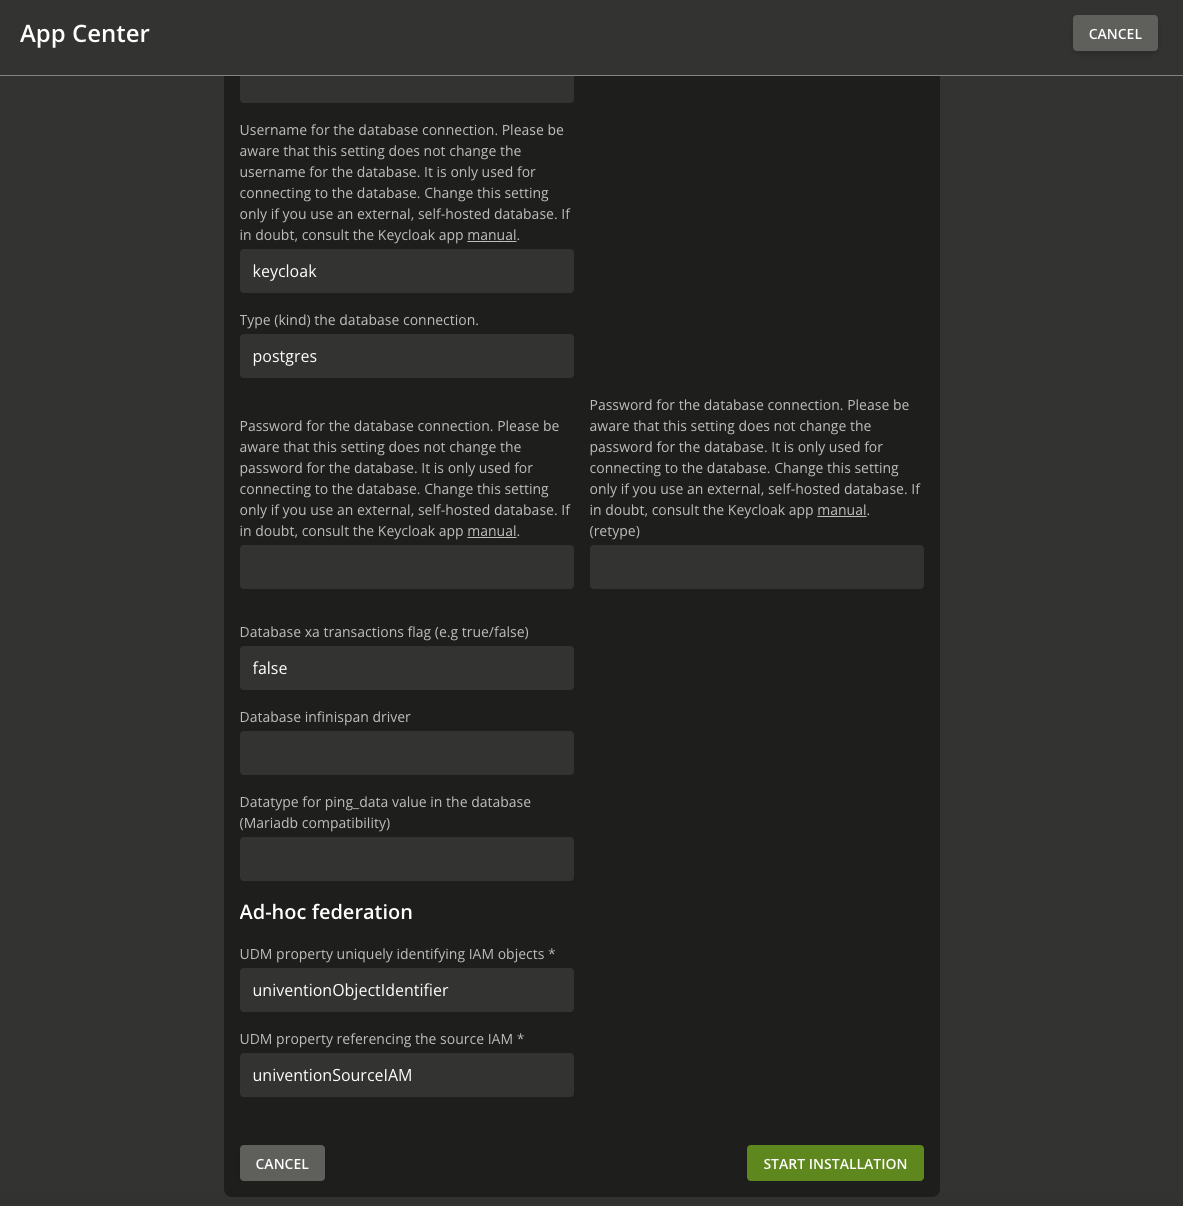
You will then be asked for configuration information in the UMC. Unless configured otherwise, the input fields can be left as they are.
Installation via Shell
Step 1: Install Keycloak via univention-app
In the shell use the command:
univention-app install keycloak
to install Keycloak on the system you´re currently on.
Check if all UCS Portal servers were added as SPs in Keycloak
Check via UMC
Step 1: Go to the Keycloak Administration UI
On the Portal Site of the server, where Keycloak is installed, click on the Keycloak tile and log in with an administrative user.
Step 2: Change to ucs Realm
In Keycloak change the realm you´re currently on to ucs
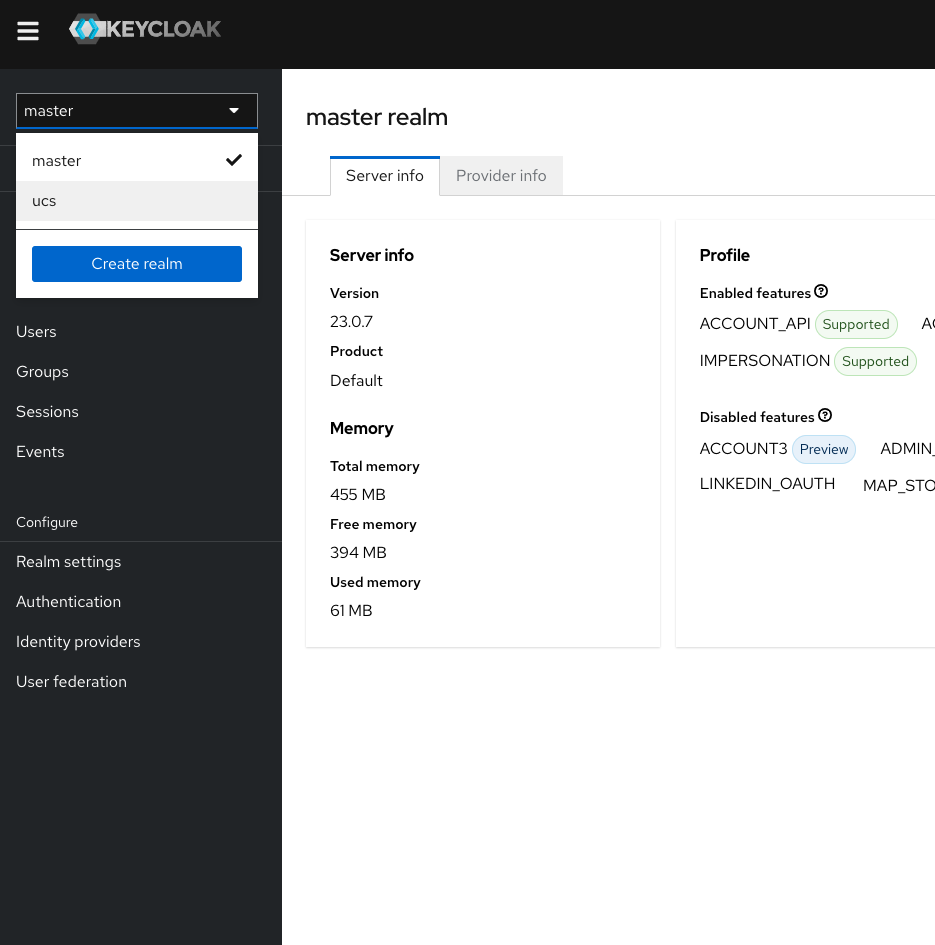
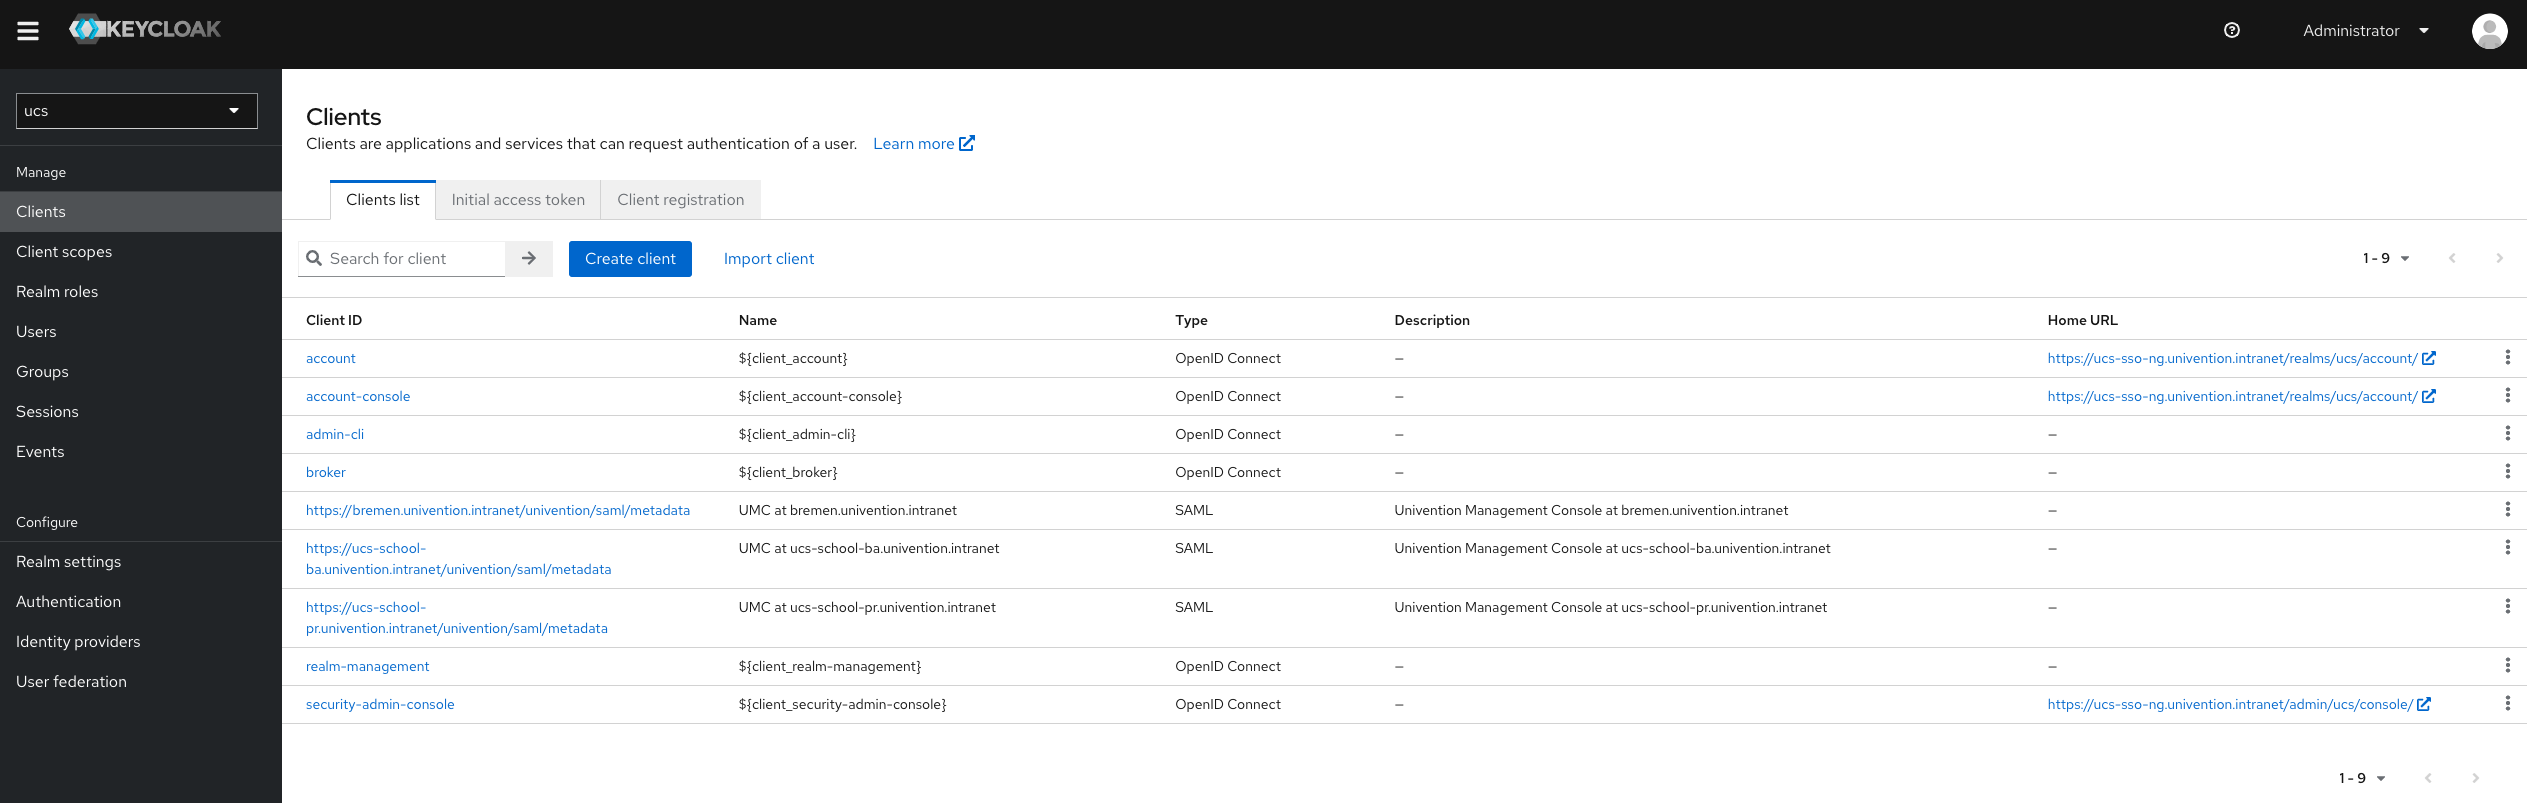
Step 3: Go to Clients
Click on “Clients” on the left sidebar. You will then see a list of all Clients added to Keycloak as SP. Check, if all your Clients were added.
Check via Shell
Use the univention-keycloak command
Use the command:
univention-keycloak saml/sp get --json
to get a list of all SPs that were added to Keycloak. Check, if all your UCS Portal Servers were added.
Add missing SPs
You can skip this step if all of your Portal servers were added correctly as SPs in Keycloak.
Automatically
To add missing SPs, the servers have to be reachable and turned on, so you can run the part of the join script 50keycloak.inst on the system, where Keycloak is installed:
domainname="$(ucr get domainname)"
for umc in $(univention-ldapsearch -LLL univentionService="Univention Management Console" displayName | sed -n 's/displayName: //p' | tr ";" "\n")
do
        univention-keycloak "$@" --binduser "${keycloak_admin_user:-admin}" saml/sp create --metadata-url="https://$umc.$domainname/univention/saml/metadata" --umc-uid-mapper
        if [ "$?" != "0" ]; then
                echo "Error creating a saml serviceprovider for the umc of $umc.$domainname"
        fi

done
Manually
Add the missing servers manually, as described here.
Set UCR Variables and modify LDAP object
All steps are also performable in the UMC, described here.
To use Keycloak as the default authentication on your Portal servers set the following UCRV and modify the object.
Hint : Just if you still want to be able to log in to the UMC of a specific node as an administrator (by entering the IP address of the corresponding node) via the ≡ menu / Login, better keep the default value (‘ucs’) for the UCRV portal/auth-mode.
ucr info portal/auth-mode
portal/auth-mode: ucs
 Specifies the mechanism by which users should be authenticated in the Portal when clicking the login button in the Portal's sidebar. Possible values are "saml", "oidc" and "ucs". For "saml" and "oidc", the clients have to resolve the name of the SSO server and get a trustworthy certificate.
 Categories: portal
 Default: ucs
 Type: str
Migrate settings for Nodes, where Keycloak is installed.
(Primary or Backup Node)
-
ucr set umc/saml/idp-server="https://ucs-sso-ng.$(hostname -d)/realms/ucs/protocol/saml/descriptor" -
udm portals/entry modify --dn "cn=login-saml,cn=entry,cn=portals,cn=univention,$(ucr get ldap/base)" --set activated=TRUE -
(optional)
ucr set portal/auth-mode='saml' -
systemctl restart slapd univention-portal-server -
univention-run-join-scripts --run-scripts 92univention-management-console-web-server.inst --force -
systemctl restart apache2.service
Migrate settings for all other Nodes.
Use these commands on all nodes in the environment to migrate the settings for Keycloak. Also to fix redirect issues.
-
ucr set umc/saml/idp-server="https://ucs-sso-ng.$(hostname -d)/realms/ucs/protocol/saml/descriptor" -
(optional)
ucr set portal/auth-mode='saml' -
systemctl restart slapd univention-portal-server -
univention-run-join-scripts --run-scripts 92univention-management-console-web-server.inst --force -
systemctl restart apache2.service