Full credits for this Wiki to Manuel Burgschachner from http://www.ifreak.at/
OSX
LDAP integration in OSX
There are some different tweaks to do so that you can use LDAP on OSX with the following requirements:
- Add Local User after first connection with AD
- Set “System Wide WIFI Settings” in .mobileconfig file, so that you do not need LAN for first logon.
- All Users must have full admin rights.
Generate and edit .mobileconfig File with Apple Configurator 2
At first you need to download and install Apple Configurator 2 from the App Store. With this tool you can create the .mobileconfig file.
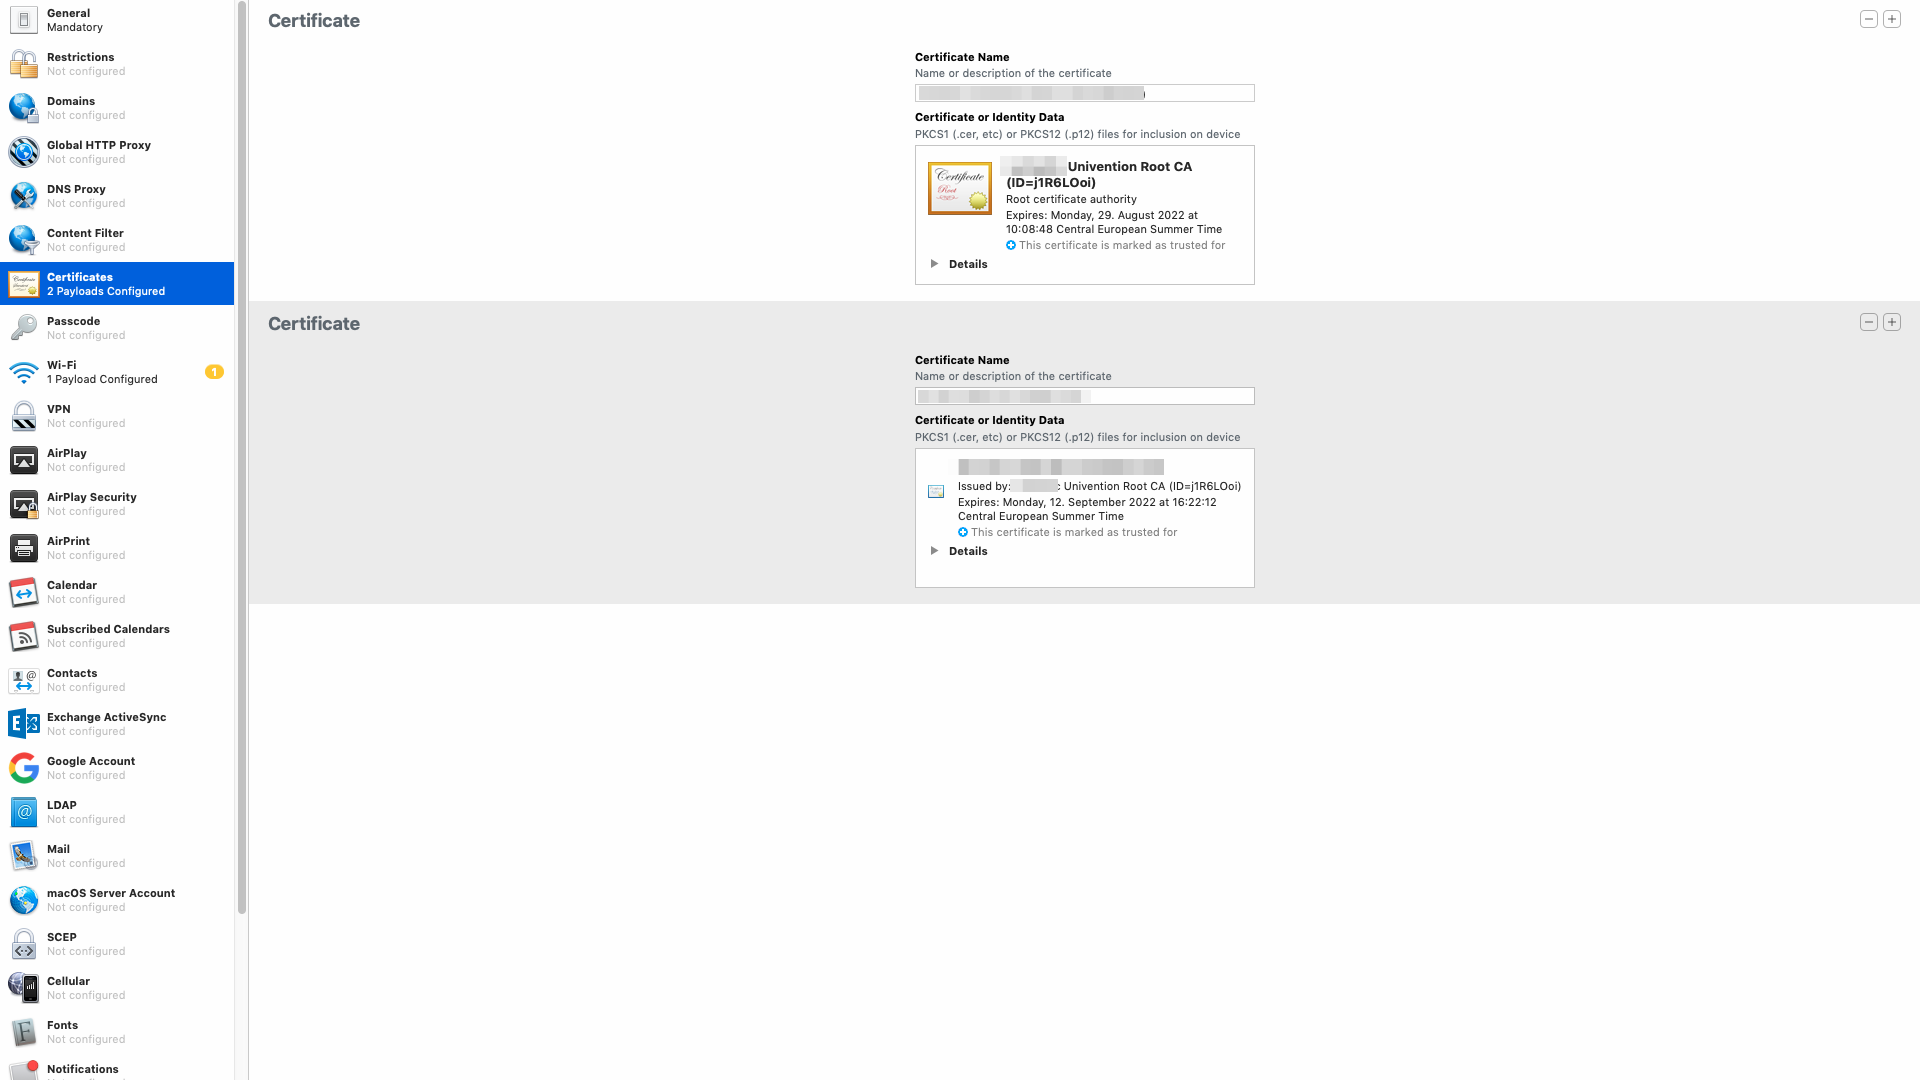
Go to File → New Profile and change to the following settings. After that, save the file.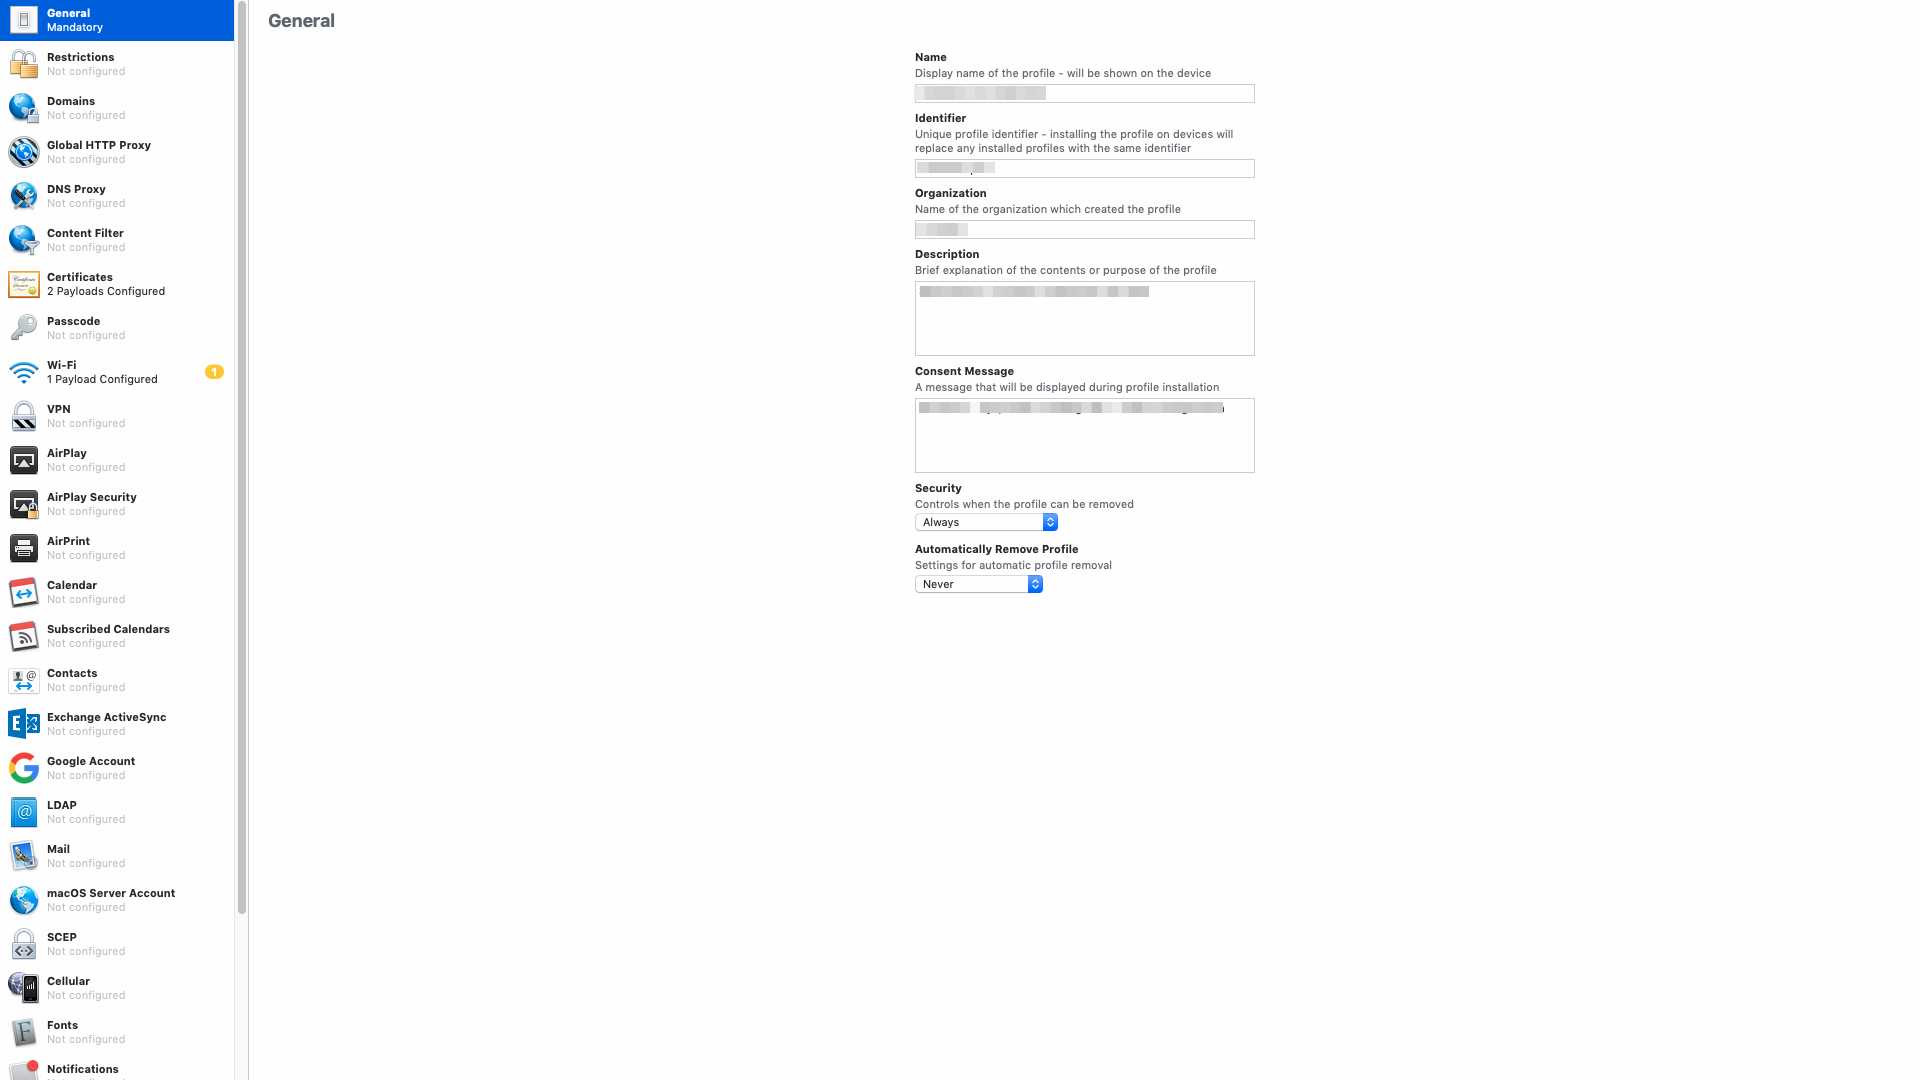
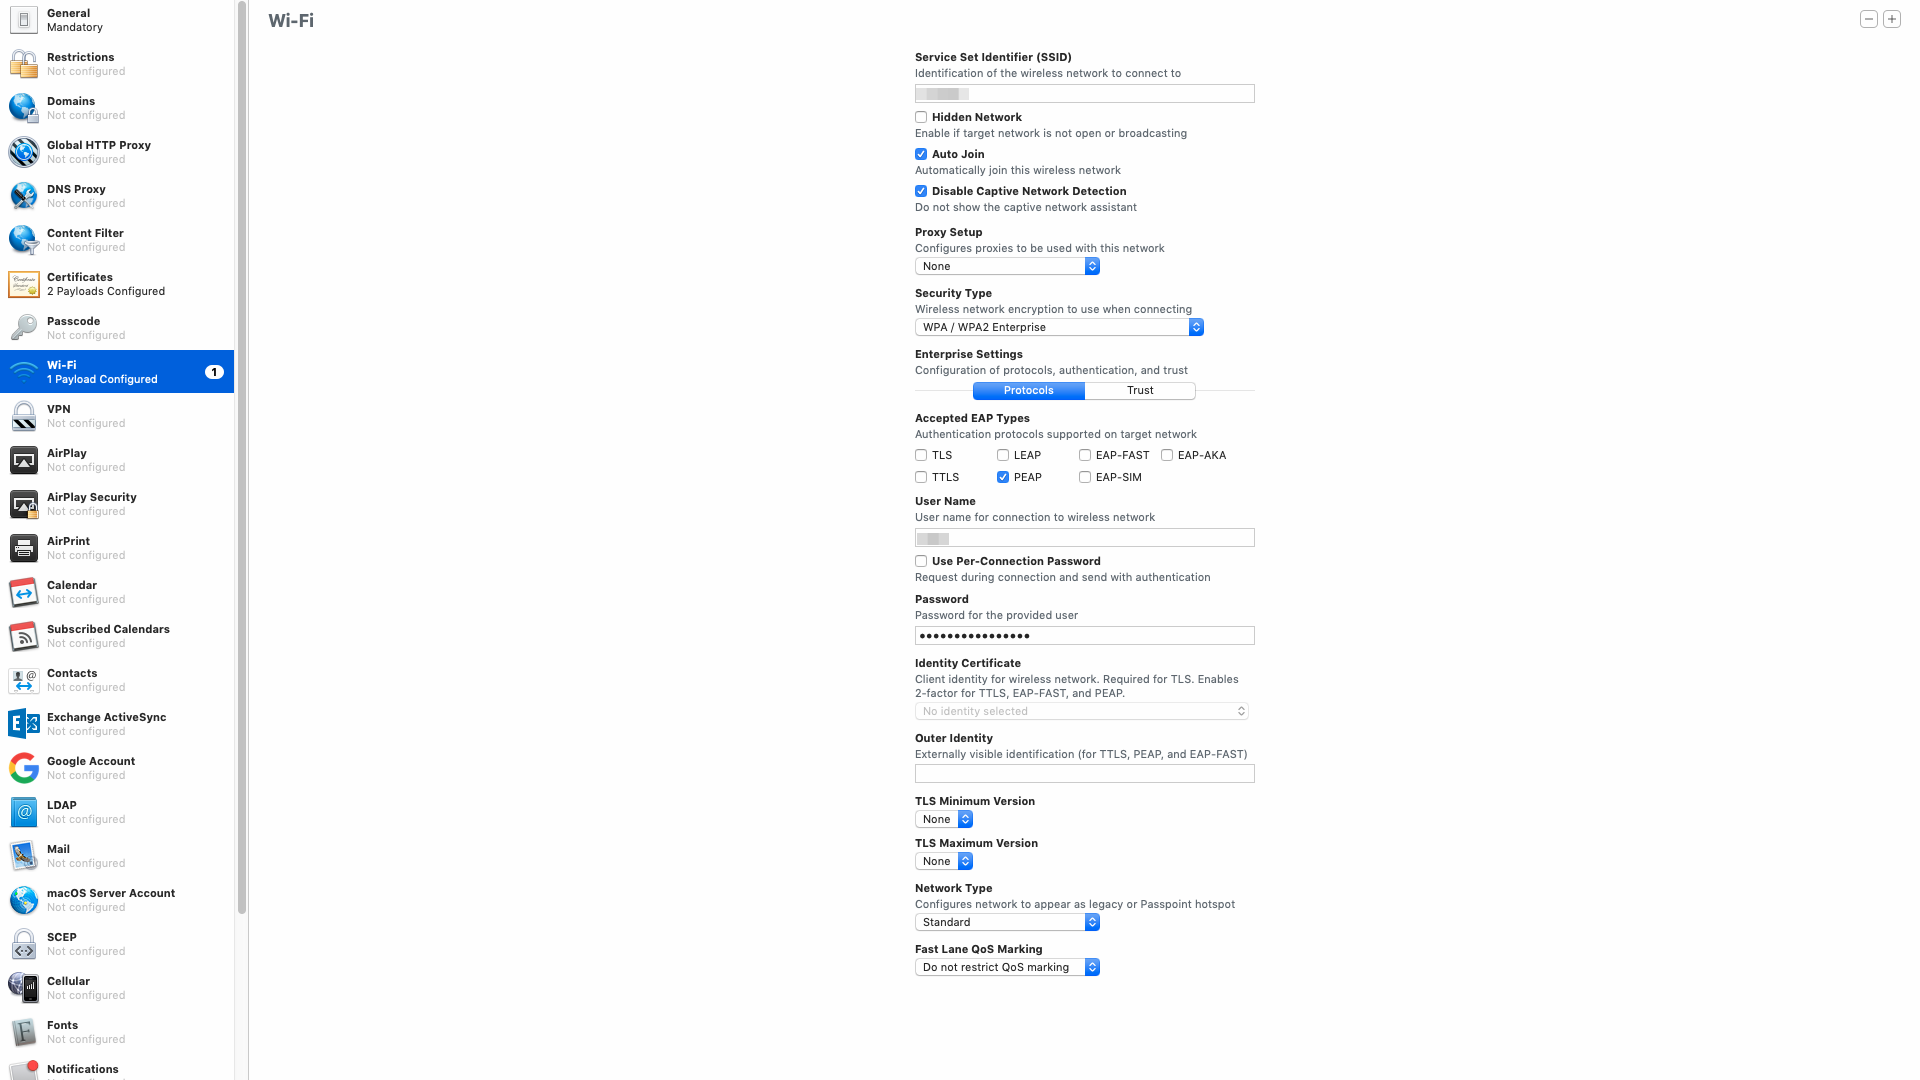
Then you have to edit the .mobileconfig (xml) file and insert the following. You have to to that because normally the .mobileconfig is just a user profile definition. With this tweak it will be systemwide. Then for example we can use the Wi-Fi settings systemwide.
Starting the line immediately below the SSID_STR key’s ‘<string>’ value, add this
<key>SetupModes</key>
<array>
<string>System</string>
</array>
Then, insert these lines immediately above the bottom-most PayloadType key line
<key>PayloadScope</key>
<string>System</string>
After that you can just install the .mobileconfig by double click. The profile can be shown via System Preferences → Profi
Configure AD and grant all users local login + admin rights
Go to System Preferences → Users & Groups → Login Options → Network Account Server → Join and add mydomain as AD server.
Now you have to go to Network Account Server → Edit and select OFC → Open Directory Utility → Active Directory → Show Options. There use the following settings for User Experience and Administrative.
Don´t forget to add “Domain Users” to the “Allow administration by” setting, so that every Domain User have local admin rights.
Prepare / Deploy Initial Boot Image
Before handing out the new Mac hardware an initially boot with our prepared images has to be done.
Because of the new Apple T2 Security Chip in newer Mac (after 2017) hardware it´s no longer possible to boot from network volumes.
So there is an open source bypass to boot from a fresh Mojave image with some postinstall packages implemented→ installr on github
We use the following postinstall packages:
1) 001_SkipAppleSetupAssistant-1.0.pkg SkipAppleSetupAssistant on github → Skip all setup steps at first boot
2) 002_Create Local Admin User Account.pkg pycreateuserpkg on github → Create Local Admin (python script)
createuserpkg --name="admin" --uid=600 --fullname="admin" --password="XXXXXX" --shell="/bin/bash" --admin --version=1.0 --identifier="mycompany" "002_CreateLocalAdminUserAccount.pkg"
3) 003_AddMobileConfigProfile.pkg → Implements the systemwide .mobileconfig profile.
#!/bin/bash
#
IFS=$'\n'
mkdir /tmp/profiles/
cp mac-profile.mobileconfig /tmp/profiles/
for mobileconfig in /tmp/profiles/*
do
    profiles -I -F "${mobileconfig}"
done

rm -R /tmp/profiles/
exit 0
The PKG file with the above shell script was made with PKGBuild software → pkgbuild --identifier myid --nopayload --scripts /Users/mabu/Documents/mycompany/OSX\ Client\ Automation/scripts/BindAD/scripts/ “004_BindAD.pkg”
Important: startosinstall requires that all additional packages be Distribution-style packages (typically built with productbuild ) and not component-style packages (typically built with pkgbuild ). This means that packages you use successfully with bootstrappr or Imagr or Munki won’t necessarily work with installr ; those other tools can install component-style packages. startosinstall will fail with an error if given component-style packages to install.
So we have to convert a component flat package to be a distribution-style flat packages by running the command below:
productbuild --package /path/to/component.pkg /path/to/distribution.pkg
4) 004_Create-AD-Config.pkg → AD binding and configuration for OSX
You have to set the following settings for AD binding with mobile connect + all user administration
dsconfigad -show

Active Directory Forest          = mydomain.com

Active Directory Domain          = mydomain.com

Computer Account                 = my-macbook$

Advanced Options - User Experience

  Create mobile account at login = Enabled

     Require confirmation        = Disabled

  Force home to startup disk     = Enabled

     Mount home as sharepoint    = Enabled

  Use Windows UNC path for home  = Enabled

     Network protocol to be used = smb

  Default user Shell             = /bin/bash

Advanced Options - Mappings

  Mapping UID to attribute       = not set

  Mapping user GID to attribute  = not set

  Mapping group GID to attribute = not set

  Generate Kerberos authority    = Enabled

Advanced Options - Administrative

  Preferred Domain controller    = not set

  Allowed admin groups           = domain admins,enterprise admins,Domain Users

  Authentication from any domain = Enabled

  Packet signing                 = allow

  Packet encryption              = allow

  Password change interval       = 14

  Restrict Dynamic DNS updates   = not set

  Namespace mode                 = domain
#!/bin/bash
#
sleep 10
defaults write /Library/Preferences/com.apple.loginwindow LoginwindowText "Mycompany GmbH"
defaults write /Library/Preferences/com.apple.loginwindow SHOWFULLNAME -bool true
dsconfigad -add "mydomain" -force -username "osxsvc" -password "XXXXXX" -alldomains enable -groups "Domain Users" -mobile enable -mobileconfirm disable
5) 005_ClientStuff.pkg → Install Slack, Chrome, Tunnelblick (with configuration), Virtualbox and Wunderlist
#!/bin/bash
#
IFS=$'\n'
cp -r Slack.app /Applications/
cp -r Chrome.app /Applications/
cp -r Tunnelblick.app /Applications/
cp -r Wunderlist.app /Applications/
cp -r VirtualBox.app /Applications/
cp -r vpn.tblk /Library/Application\ Support/Tunnelblick/Shared
chown -R root:wheel /Library/Application\ Support/Tunnelblick/Shared/
exit 0
6) 006_PrinterConfiguration.pkg → Install all office printers
#!/bin/bash
#
lpadmin -p printer02.mydomain.com -L "Pippo" -E -v lpd://printer02.mydomain.com -P /System/Library/Frameworks/ApplicationServices.framework/Versions/A/Frameworks/PrintCore.framework/Versions/A/Resources/Generic.ppd -o printer-is-shared=false

lpadmin -p printer03.mydomain.com -L "Pluto" -E -v lpd://printer03.mydomain.com -P /System/Library/Frameworks/ApplicationServices.framework/Versions/A/Frameworks/PrintCore.framework/Versions/A/Resources/Generic.ppd -o printer-is-shared=false

lpadmin -p printer04.mydomain.com -L "Minnie" -E -v lpd://printer04.mydomain.com -P /System/Library/Frameworks/ApplicationServices.framework/Versions/A/Frameworks/PrintCore.framework/Versions/A/Resources/Generic.ppd -o printer-is-shared=false

lpadmin -p printer05.mydomain.com -L "Paperino" -E -v lpd://printer05.mydomain.com -P /System/Library/Frameworks/ApplicationServices.framework/Versions/A/Frameworks/PrintCore.framework/Versions/A/Resources/Generic.ppd -o printer-is-shared=false

lpadmin -p printer07.mydomain.com -L "Paperone" -E -v lpd://printer07.mydomain.com -P /System/Library/Frameworks/ApplicationServices.framework/Versions/A/Frameworks/PrintCore.framework/Versions/A/Resources/Generic.ppd -o printer-is-shared=false

lpadmin -p printer09.mydomain.com -L "Nonna papera" -E -v lpd://printer09.mydomain.com -P /System/Library/Frameworks/ApplicationServices.framework/Versions/A/Frameworks/PrintCore.framework/Versions/A/Resources/Generic.ppd -o printer-is-shared=false

lpadmin -p printer10.mydomain.com -L "Topolino" -E -v lpd://printer10.mydomain.com -P /System/Library/Frameworks/ApplicationServices.framework/Versions/A/Frameworks/PrintCore.framework/Versions/A/Resources/Generic.ppd -o printer-is-shared=false

lpadmin -p printer12.mydomain.com -L "Gastone" -E -v lpd://printer12.mydomain.com -P /System/Library/Frameworks/ApplicationServices.framework/Versions/A/Frameworks/PrintCore.framework/Versions/A/Resources/Generic.ppd -o printer-is-shared=false

lpadmin -p printer13.mydomain.com -L "Rocco" -E -v lpd://printer13.mydomain.com -P /System/Library/Frameworks/ApplicationServices.framework/Versions/A/Frameworks/PrintCore.framework/Versions/A/Resources/Generic.ppd -o printer-is-shared=false

exit 0
Generate & start initial boot image
For the initial boot image you just have to do following with installr:
Copy an Install macOS application into the install/ directory. This must be a “full” installer, containing the Contents/Resources/startosinstall tool.
Add desired packages to the install/packages directory.
- Preparation:
- Copy the contents of the install directory to a USB Thumb drive.
- Running installr:
- Start up in Recovery mode.
- Connect USB Thumbdrive.
- Open Terminal (from the Utilities menu if in Recovery).
-
/Volumes/VOLUME_NAME/run(usesudoif not in Recovery)
WIN
Domain join with Windows 10:
Settings > Access for work or school
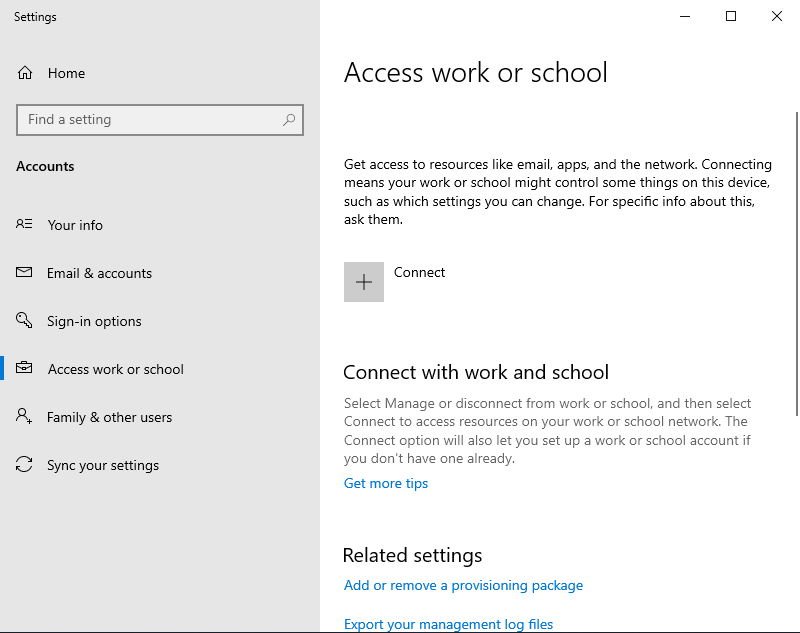
Join this device to a local Active Directory domain

domain name mycompany.com, needed administrator user for the join.
You can skip the local user (domain users are local admins per policy if created using group policy: check in univention help).
UBUNTU
Domain join with Univention tool:
sudo add-apt-repository ppa:univention-dev/ppa
sudo apt-get update
apt-get install univention-domain-join
then you can do it via GUI or cli
univention-domain-join (GUI)
univention-domain-join-cli --domain mydomain.com