Use Case: Restrict Access to a Client in Keycloak for Self-Registered Users
In Keycloak, a common method to restrict access to specific clients is through roles, groups, or group membership attributes (see our documentation for default configurations). This article provides an example of how to configure authorization based on a role assigned to all accounts in a specific backend of the user federation. The goal is to ensure that only self-registered users from the Univention self-service app can access a particular client.
Background
The Univention Self-Service module does not create separate groups or assign memberships to self-registered accounts. By default, these accounts are created in their own container, directly under the root of the LDAP directory (here: "cn=self registered users,dc=test,dc=intranet").
While there are various ways to implement restricted access in Keycloak and/or UCS, this guide presents a solution that requires no additional programming. It involves separating normal user accounts and self-registered accounts into two distinct user federations in Keycloak. The federation containing self-registered users will use the so-called “hardcoded role mapper” to automatically assign a specific role to all accounts in this federation.
Step-by-Step Configuration
Create a Realm Role for Self-Registered Users
- In the left navigation menu, go to Realm Roles and click Create role.
- Give the role a meaningful name, such as guest.
- Optionally, add a description.
- Save the role.
Add a separate provider to the user federation
Please note that you can not just apply this change without checking if it fits the structure of your LDAP directory. To avoid duplicate accounts in Keycloak, ensure that the search bases for regular users and self-registered users do not overlap or work with priorities. The following is an approach based on the simple default structure:
Modify the default user federation (called “ldap-provider”)
In the Settings tab, under LDAP Searching and Updating, adjust the Users DN to the more specific cn=users,dc=test,dc=intranet (instead of dc=test,dc=intranet).
Create a new provider
- Go to User Federation in the left navigation and click Add provider.
-
Settings Tab:
-
UI Display Name:
selfservice -
Vendor:
Other -
Connection and Authentication Settings: Use the same connection settings and bind credentials as in the default “ldap-provider”. The bind password is stored in
/etc/idp-ldap-user.secret.
-
UI Display Name:
-
LDAP Searching and Updating:
-
Edit Mode:
READ_ONLY -
Users DN:
cn=self-registered-users,dc=test,dc=intranet(adapt to your LDAP setup) -
Username LDAP Attribute:
uid -
RDN LDAP Attribute:
uid -
UUID LDAP Attribute:
entryUUID -
User Object Classes:
person,organizationalPerson,univentionPasswordSelfService -
User LDAP Filter:
(uid=*) -
Search Scope:
One Level -
Pagination:
On -
Kerberos Integration:
Allow Kerberos Authentication=Off
-
Edit Mode:
- Save the settings and proceed to the Mappers tab.
Add Mappers for LDAP Attributes to the new provider
Add mappers for the LDAP attributes you need. Typically, you will need at least the following attributes:
uiddisplayNameentryUUID
For each attribute:
- Click Add mapper.
- Enter the name of the attribute.
- Select Mapper type:
user-attribute-ldap-mapper. - Fill out the form as per the configuration in your ldap-provider.
Assign a Hardcoded Role to Self-Registered Users
-
Click Add Mapper.
-
Name:
guests-mapper -
Mapper Type:
hardcoded-ldap-role-mapper -
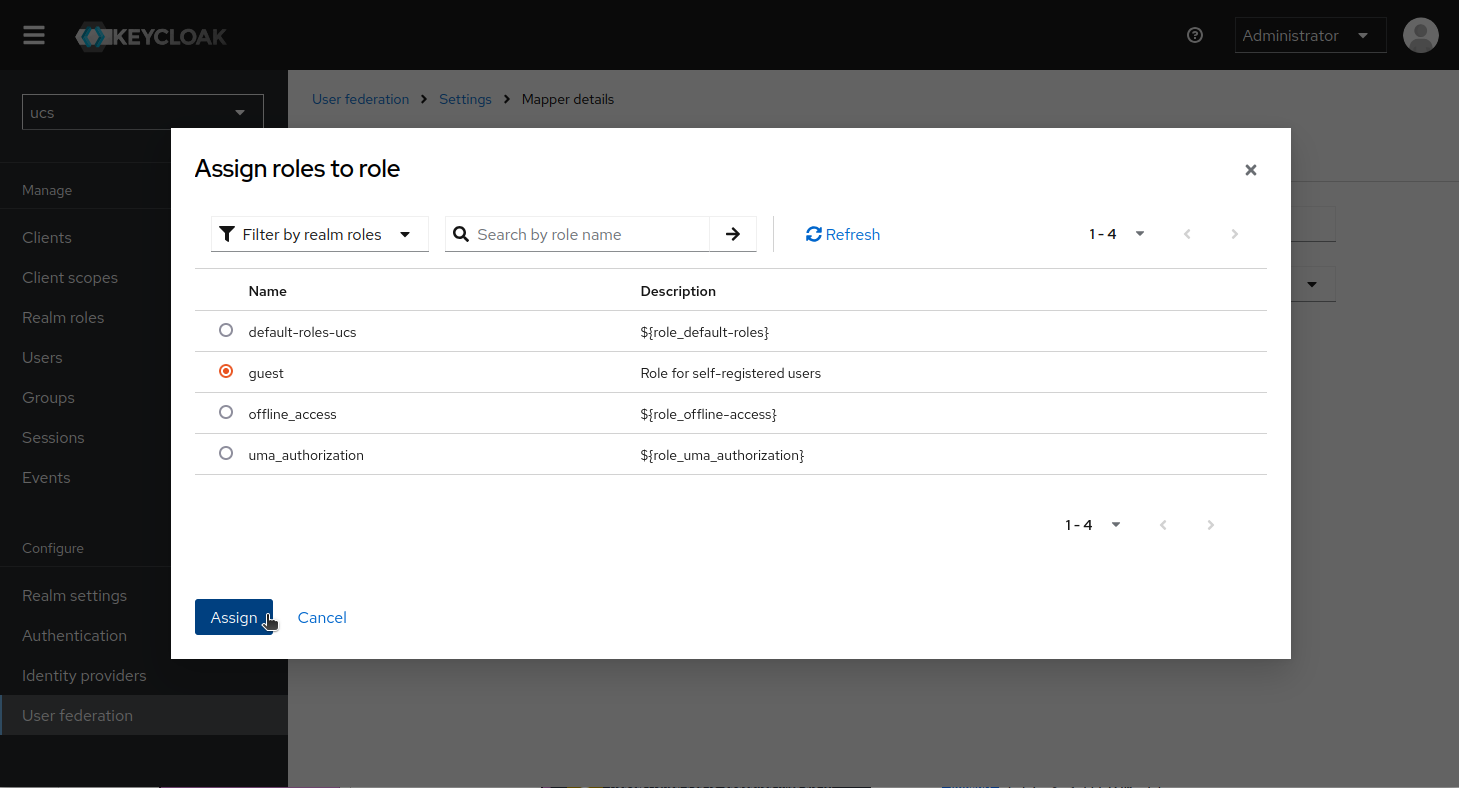
Select Role: Click Select role.
-
In the filter, choose Filter by realm roles, then select the guest role and click Assign.

-
Save the mapper.
Adjust User Federation Priorities
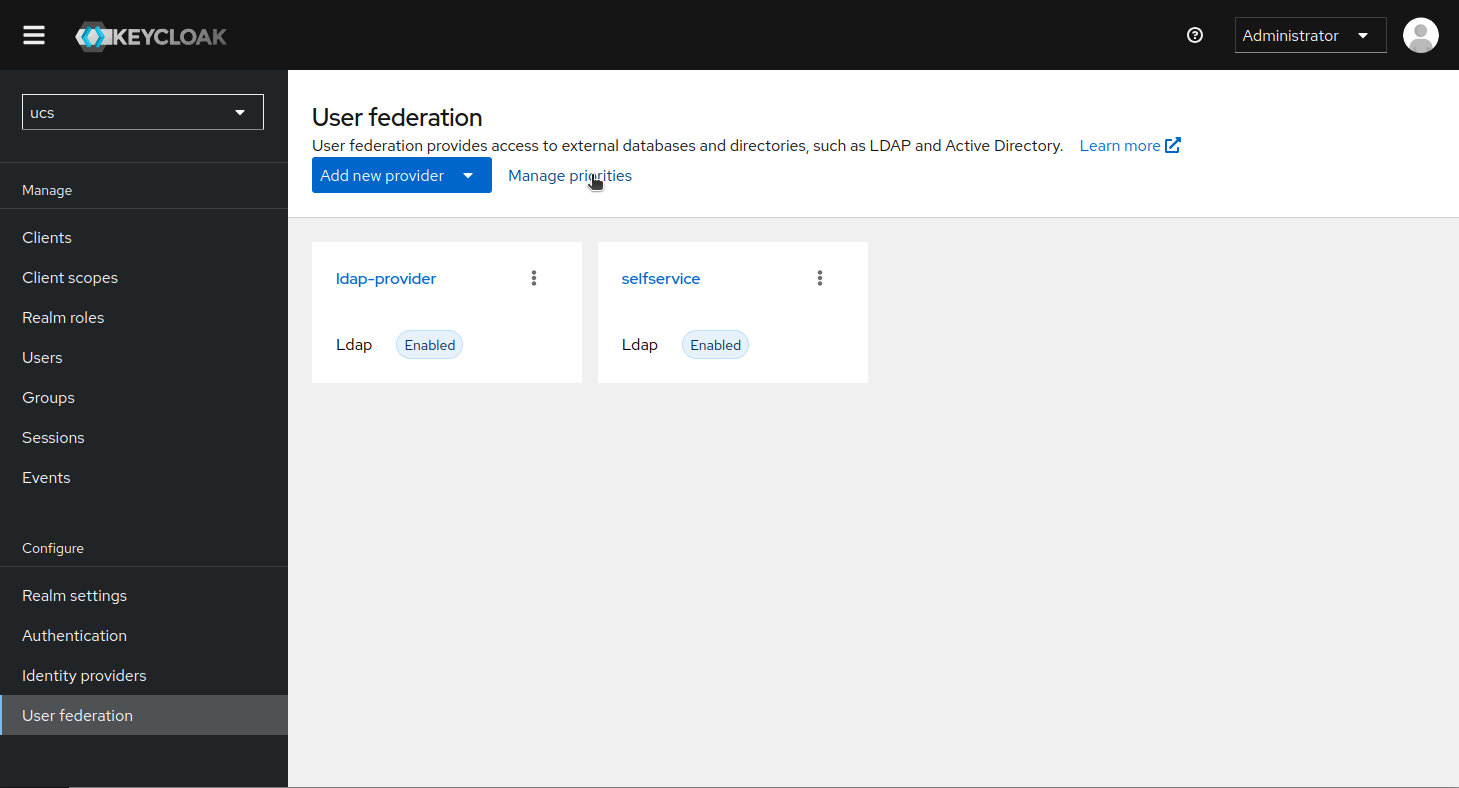
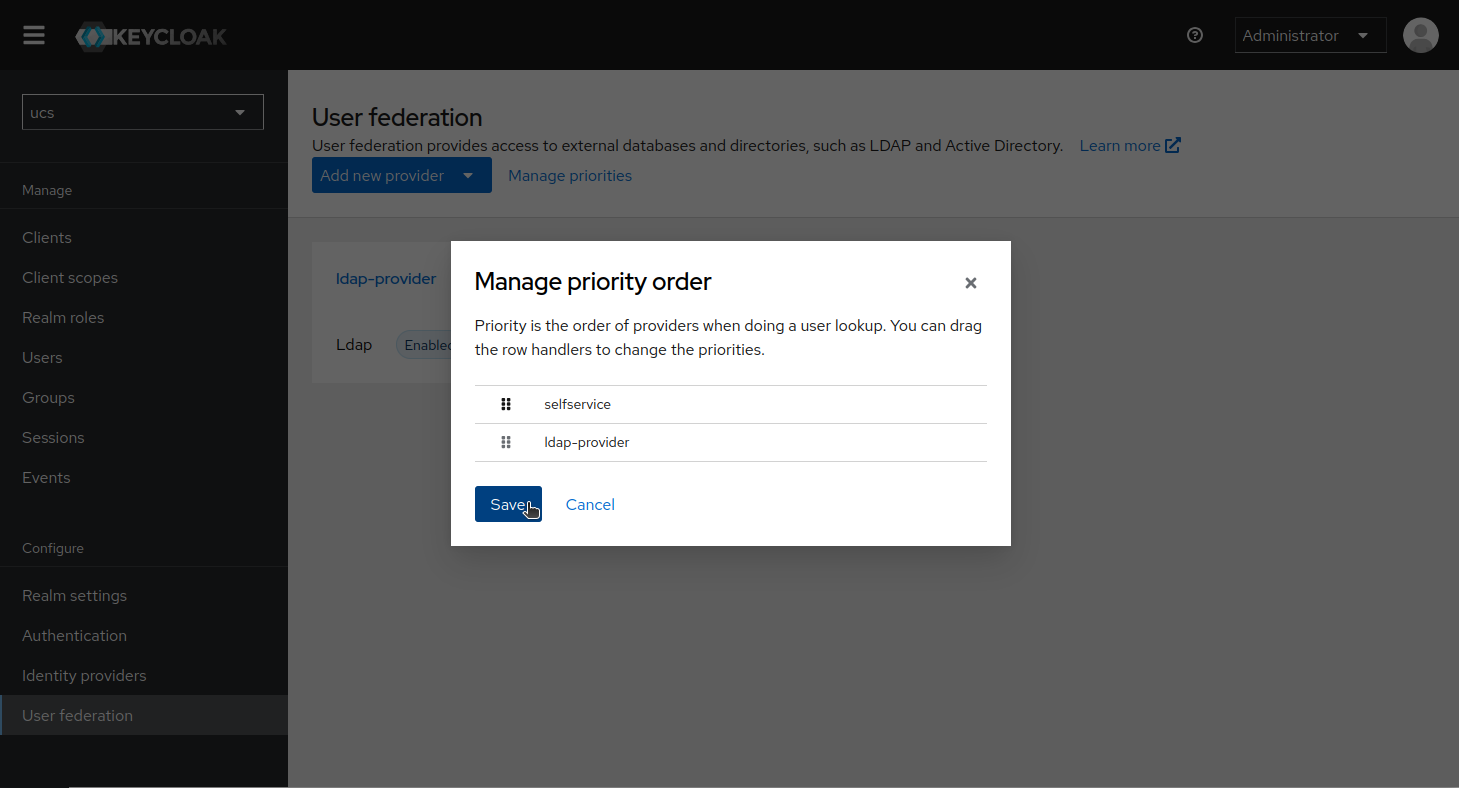
The following can help you avoid duplicates if the directory with your regular users has a more complicated structure. To ensure that the self-registered users’ federation is used first, go to Manage priorities in the User Providers overview and move the self-registered users provider to the top. This will prevent the regular LDAP provider from being queried if the username exists in the self-registered users federation.


Create a Custom Authentication Flow
-
Run the following command to create a custom authentication flow:
univention-keycloak legacy-authentication-flow create -
Assign this authentication flow to the client you wish to restrict access to:
univention-keycloak client-auth-flow --clientid "REPLACE_WITH_YOUR_CLIENT_ID" --auth-flow "browser flow with legacy app authorization"
Configure the “Univention App Authenticator”
The Univention App Authenticator is a built-in authenticator that checks if the logged-in user is authorized to access the client application. It requires a role to be configured on the Keycloak client, specifically looking for the client role univentionClientAccess.
- Go to the client configuration in Keycloak.
- Open the Roles tab and click Create role.
- Name the role univentionClientAccess and save it.
Now link the client-specific role with the authorized accounts:
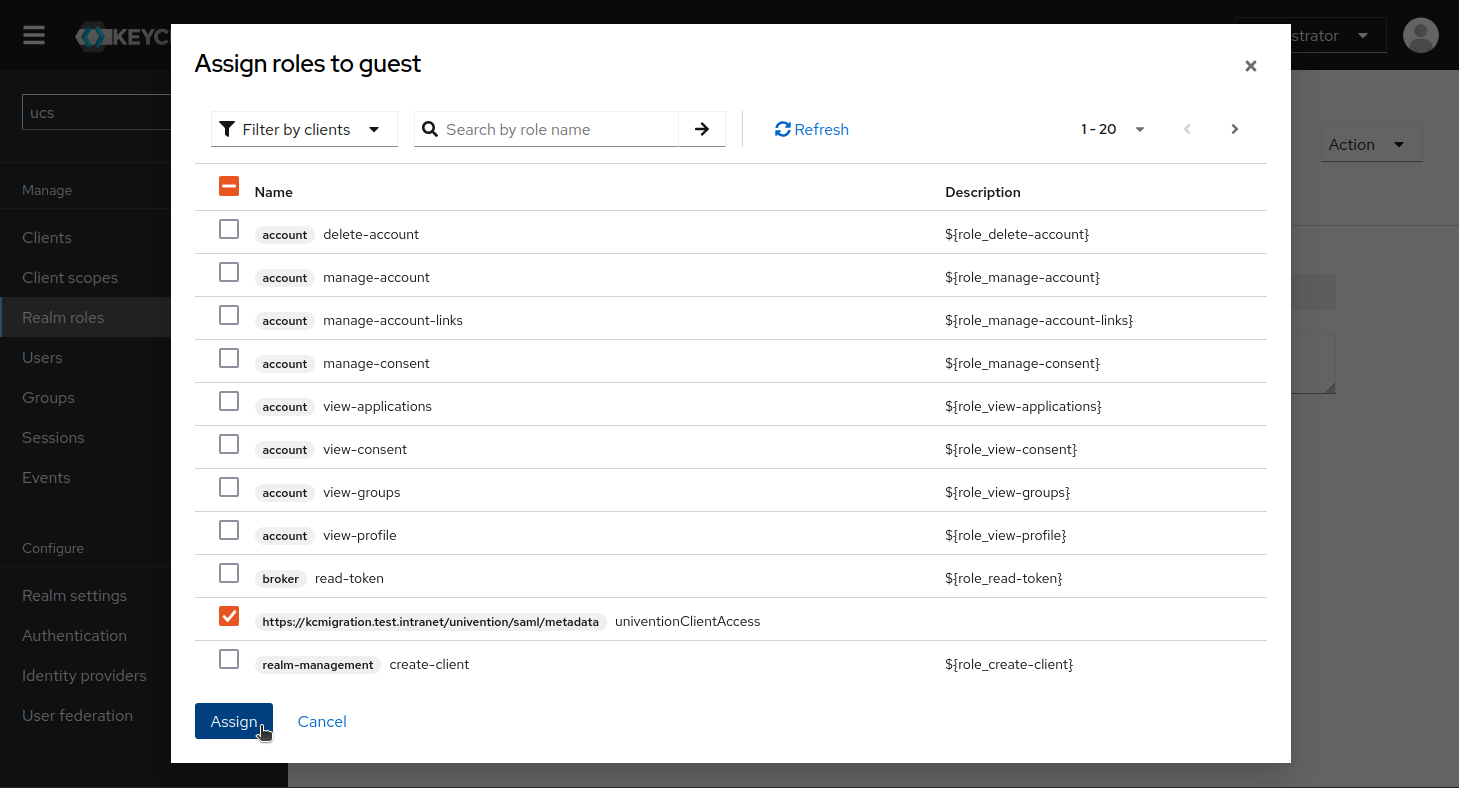
- Go to Realm Roles, select your guest role, and open the Actions menu in the upper right corner.
- Select Add associated roles.
- In the filter, choose Filter by clients and select the client ID with the univentionClientAccess role.

- Click Assign.
Test the Configuration
Open a new browser window (ensuring no previous login cookies are present) and test the authentication process.
Edit: Please test this configuration thoroughly after app updates. While the manually added user federation provider will not be modified during updates, minor changes to the default “ldap-provider” may occur.
This approach ensures that only self-registered users are able to access the client, leveraging Keycloak’s role mapping and user federation features without requiring custom coding.