With the introduction of Keycloak, we introduced an identity provider (IdP) to Nubus installations that speaks the protocols SAML 2.0, OAuth 2.0 and OpenID Connect 1.0. For all those who are used to working with the SimpleSAMLphp IdP, the concept of scopes may be new. This article supports you in configuring scopes in Keycloak.
What is a scope? How is it meant to be used?
Scopes have been specified in the OAuth 2.0 Authorization Framework (RFC6749, section 3.3). The specification is very generic: An access token that is exchanged between a client application and an authorization server can have a “scope”. An access token therefore does not necessarily give an application full access to all user information, but to configurable parts of it. (This involves user attributes, for example from an identity management system).
A client application requests the scope(s) it needs in the OAuth 2.0 authorization request. Scopes are transmitted as a space-separated list of strings. Their order is irrelevant, but scopes are case sensitive.
The authorization server that receives the access request may ignore requested scopes. It only relies on its own configuration. Thus the administrators of an identity provider have control over which user information is released to which service.
In OpenID Connect 1.0 things become clearer: There are specific scopes defined in the specification. Scopes can be described as bundles of user attributes that have been grouped in terms of content. “Claim” is the term for “attribute” in OIDC. By the way, it is via a specific scope that an authorization server is informed that it should use OIDC 1.0 instead of OAuth 2.0: Whenever a client application requests the scope “openid” (among others) in the initial authentication request it triggers the use of OIDC.
The following standard scopes are used in OIDC to request access to specific claims. (In practice, only claims that have values set in the identity management system are sent.)
| Scope | Claims (attributes) |
|---|---|
| profile | name, family_name, given_name, middle_name, nickname, preferred_username, profile, picture, website, genderbirthdate, zoneinfo, locale, updated_at |
| email, email_verified | |
| address | address |
| phone | phone_number, phone_number_verified |
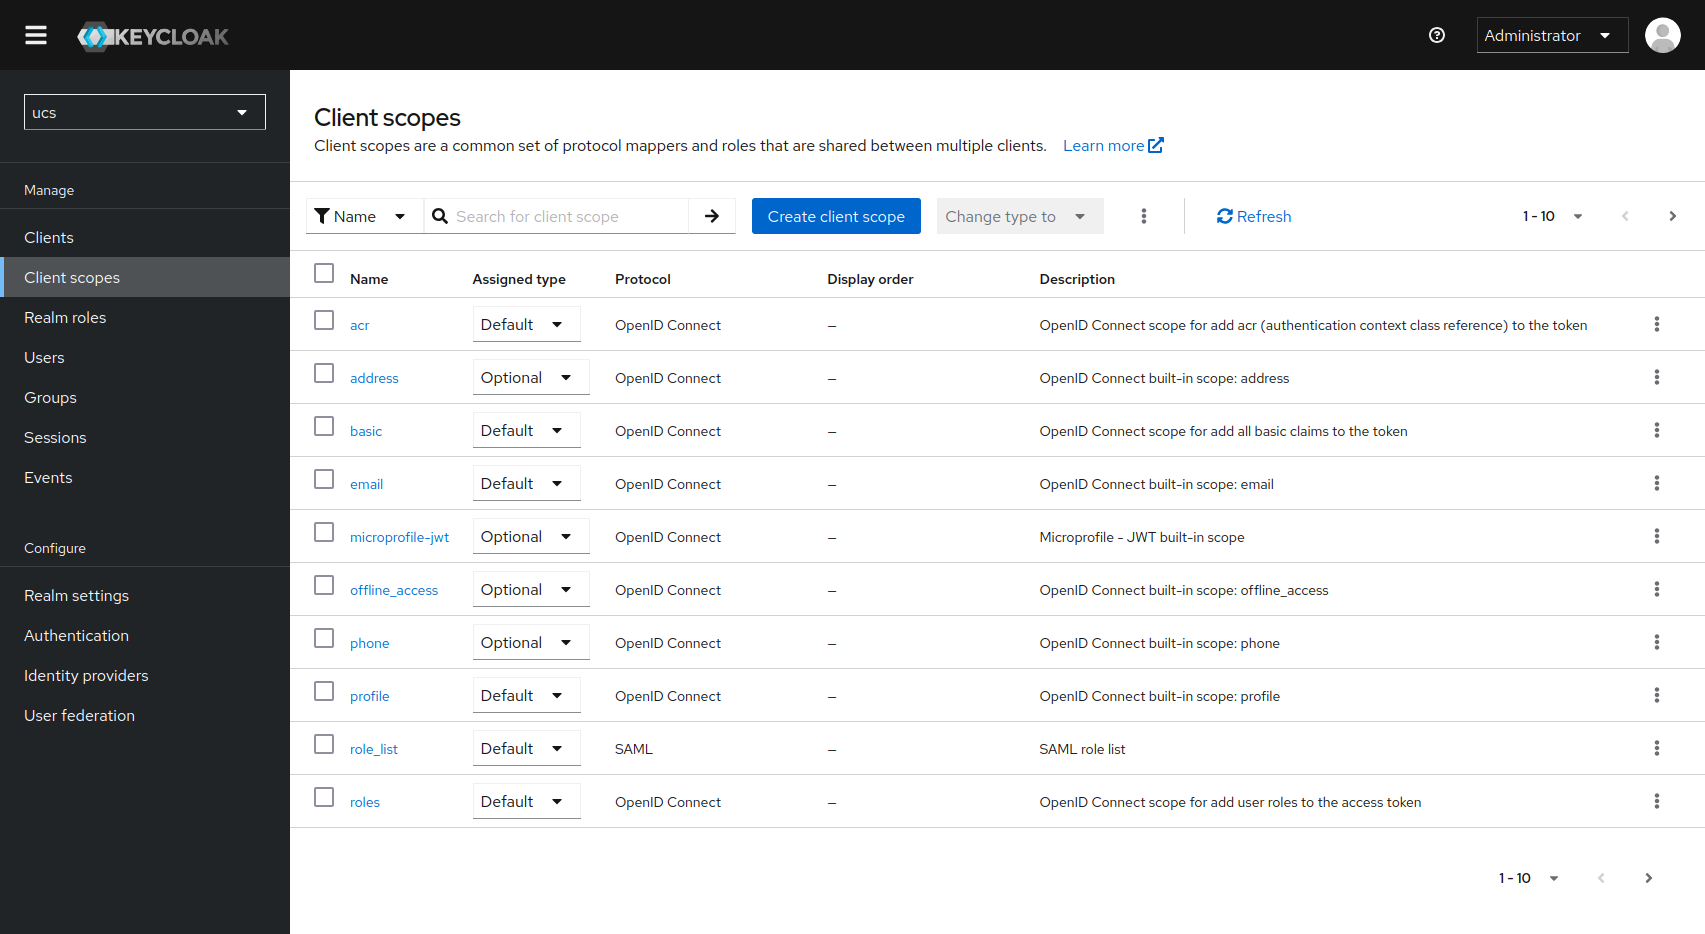
You can find these scopes as preconfigured client scopes in Keycloak.
Critically check the release of scopes
Checking the default scope sharing settings in Nubus’ Keycloak app, you will notice that they are configured relatively liberally. In the general navigation, you will find the global scopes for the realm under “Client Scopes”. In the “Assigned Type” column, you can see how each scope is generally handled:
- Default: the scope is transferred to all client applications
- Optional: the scope is transmitted to the client applications that request this scope in the authentication request
- None: the scope is generally not transferred
We recommend restricting the global release of scopes. You can then decide in the configuration of the individual client applications whether to deviate from the globally valid rules. This is particularly relevant if you also use applications from external providers, not just in-house services or applications from the UCS Appcenter that you administer yourself.
In the configuration of each client application, you will again find a “Client Scopes” tab. Here you configure the release of the desired scopes for the respective client - just as above.
Define your own scopes and assign them to specific client applications
In addition to the predefined scopes, you can also define your own scopes in Keycloak. This allows you to define exactly which claims should be included and who receives the scope. Scopes that are specifically tailored to individual client applications are a common application scenario.
Creating and assigning scopes is somewhat confusing in Keycloak’s user interface. Here is how you can to do it.
The goals are:
- to define a scope with two claims (here: employeeNumber and telephoneNumber)
- to release the scope to only one client
Mapping the desired claims
The first step is to ensure that the desired claims are retrieved from the UCS LDAP in the first place. The quickest way to do this is on the command line:
univention-keycloak user-attribute-ldap-mapper create employeeNumber
univention-keycloak user-attribute-ldap-mapper create telephoneNumber
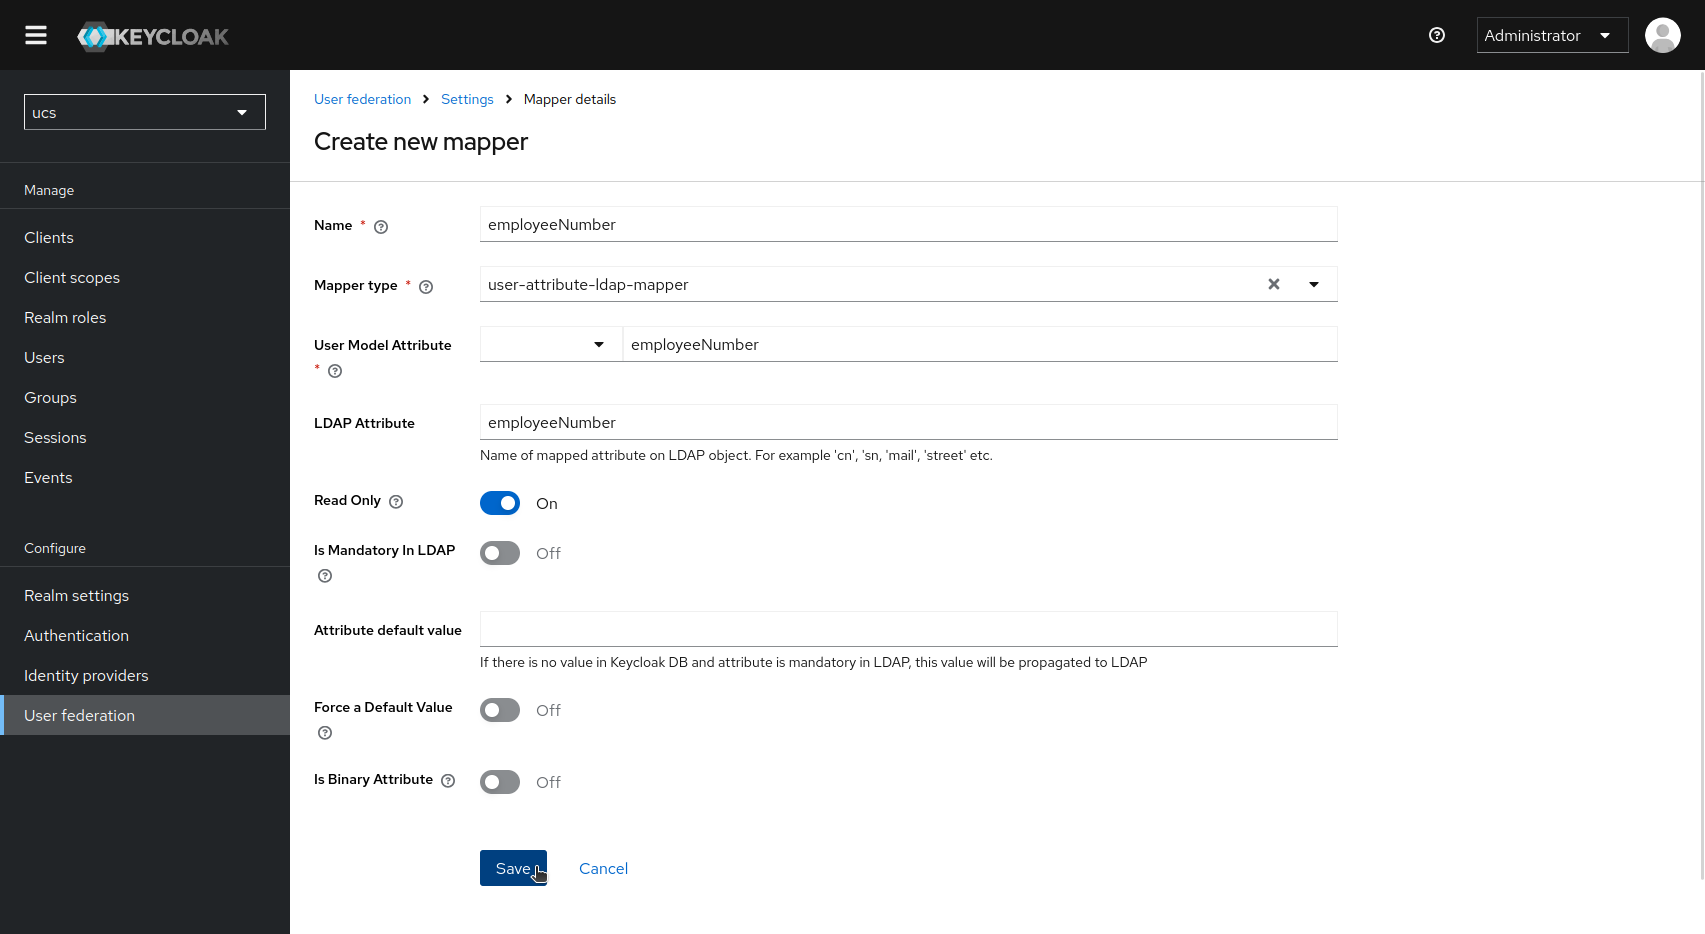
Alternatively, create the claims in the web interface (User federation → ldap-provider → Mappers tab → Add mapper, mapper type user-attribute-ldap-mapper).
Creating the scope
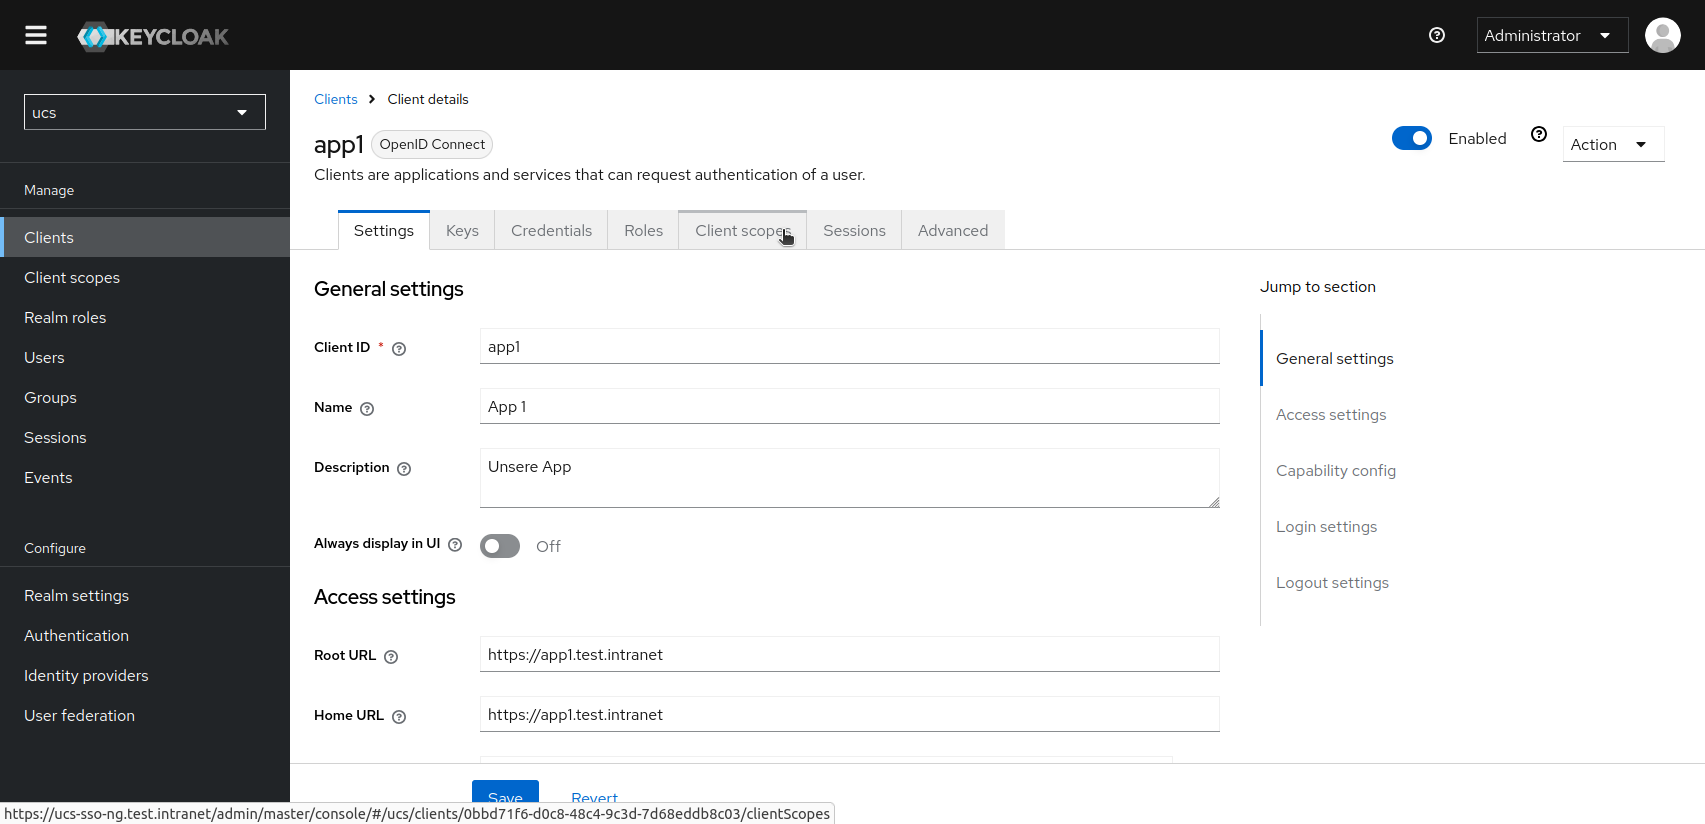
You can currently only create and configure scopes via the web interface. The univention-keycloak command does not support this part of the Keycloak API. Create a new scope under “Client scopes”. In this example, the scope is named after the sample application (“app1”) to which the information is to be released. Please note the following settings:
- Selecting “none” for “Type” means that the scope “app1” is not transferred to clients. (The exception follows below).
- The “Include in token scope” switch must be activated.

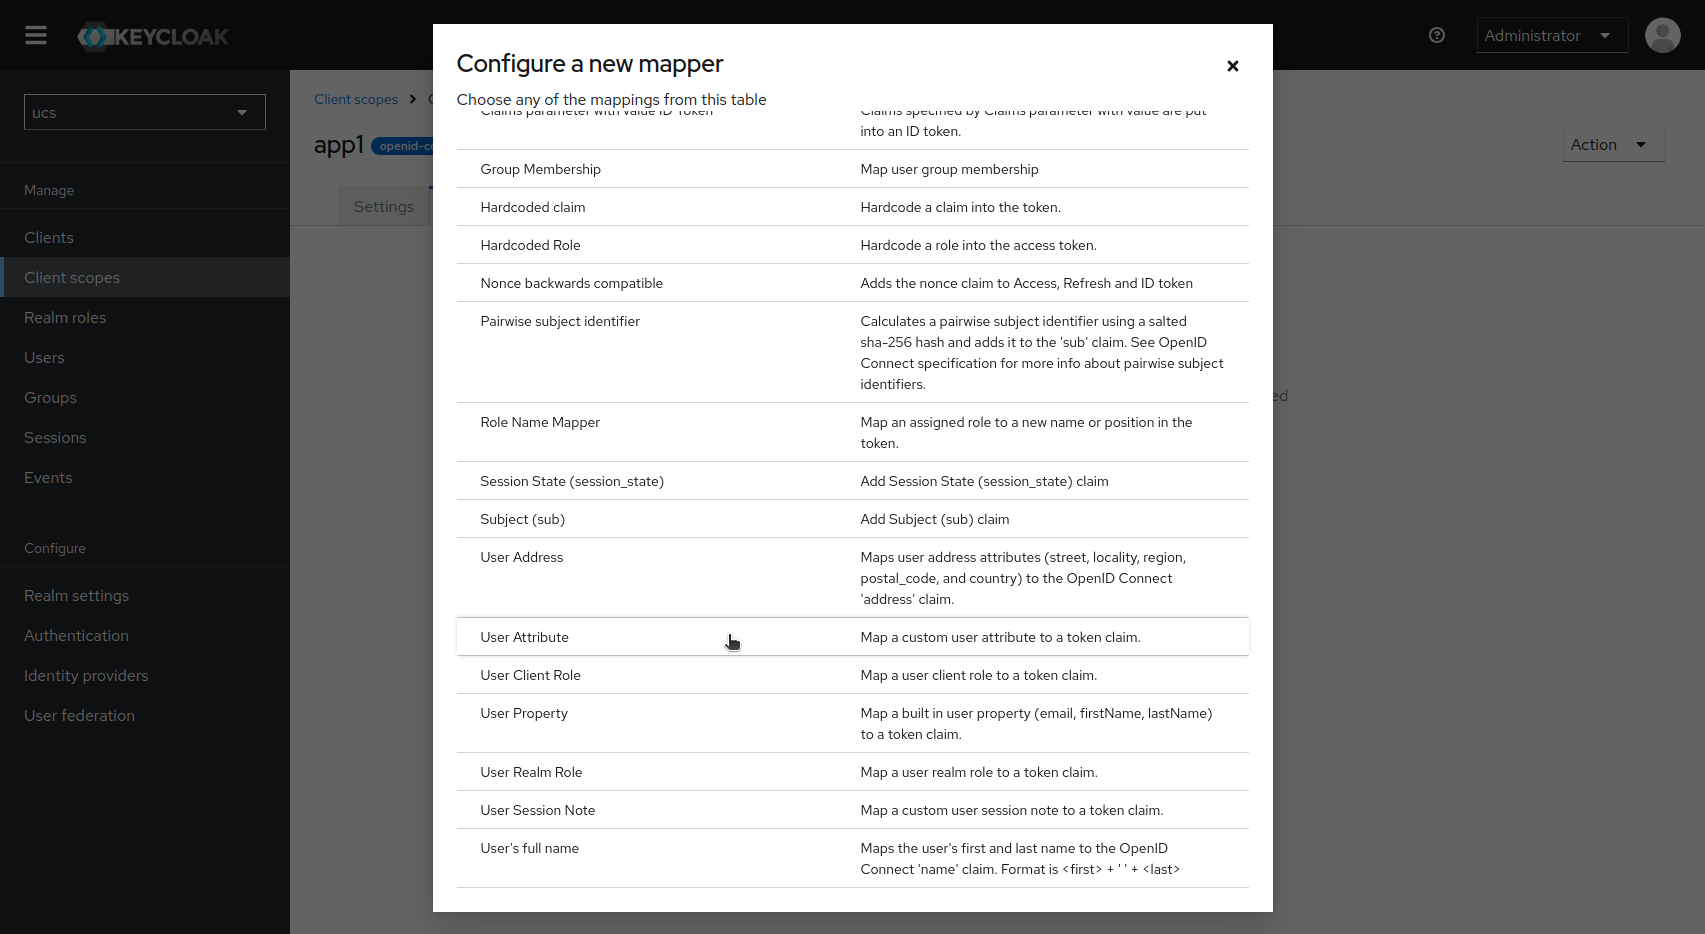
After saving the new scope, switch to the second tab “Mappers” and click on “Configure a new mapper”. Select “User Attributes” from the list of suggestions.
Fill in the form for the desired claim.
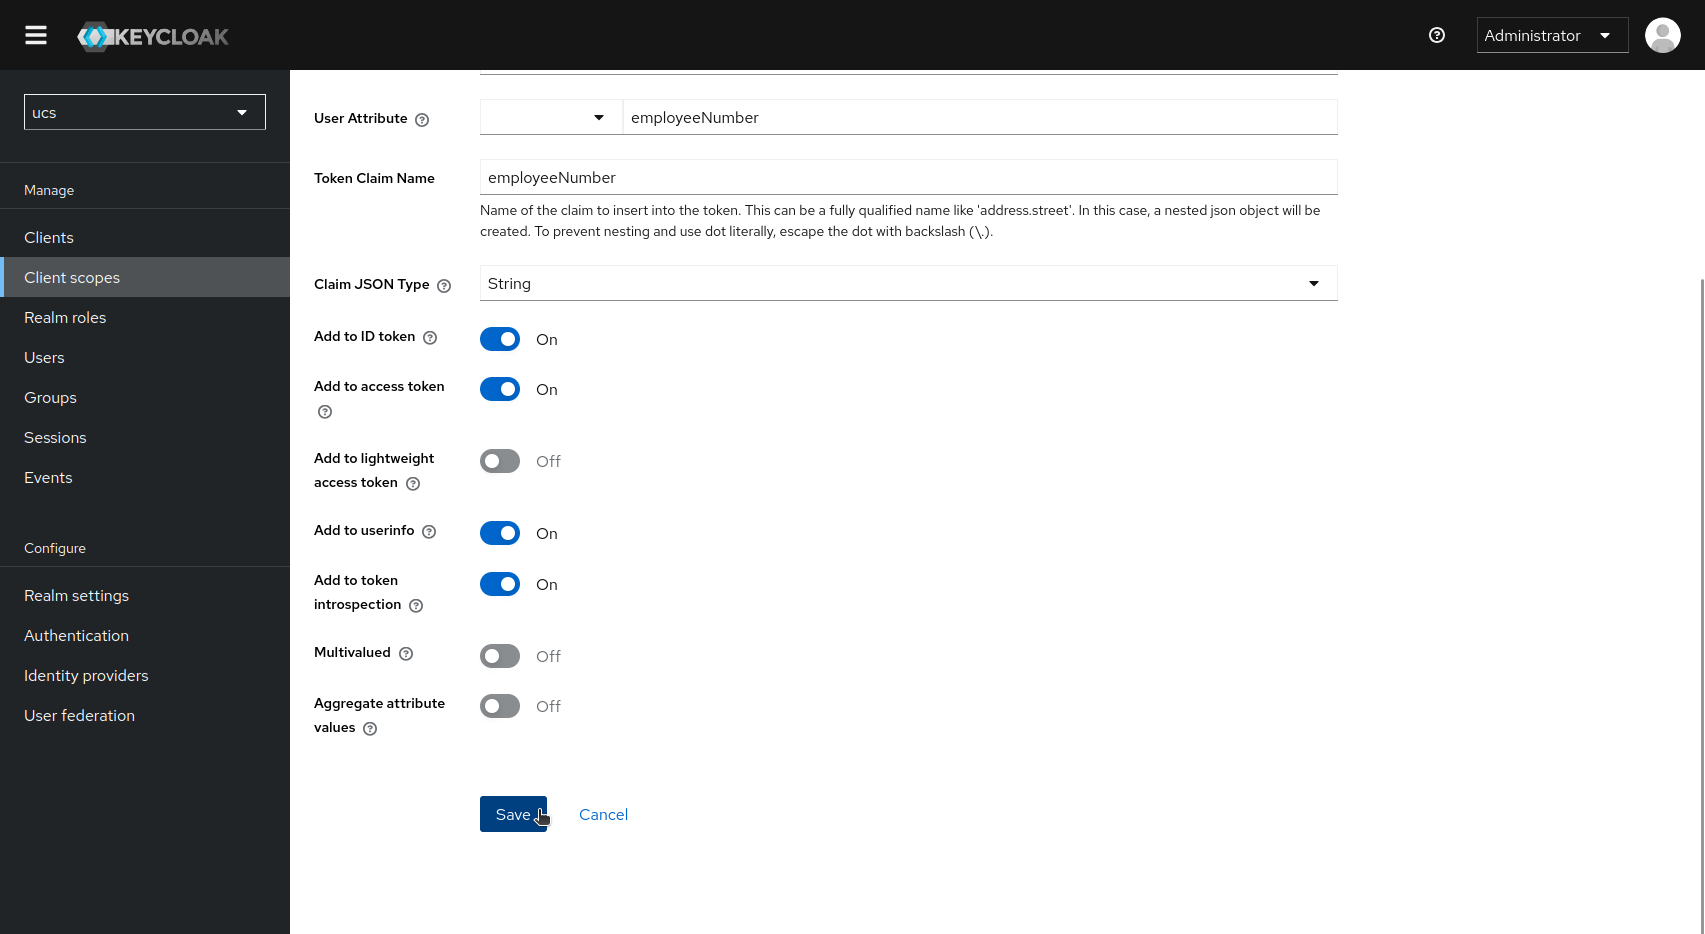
Afterwards, you will have a mapping for each claim:

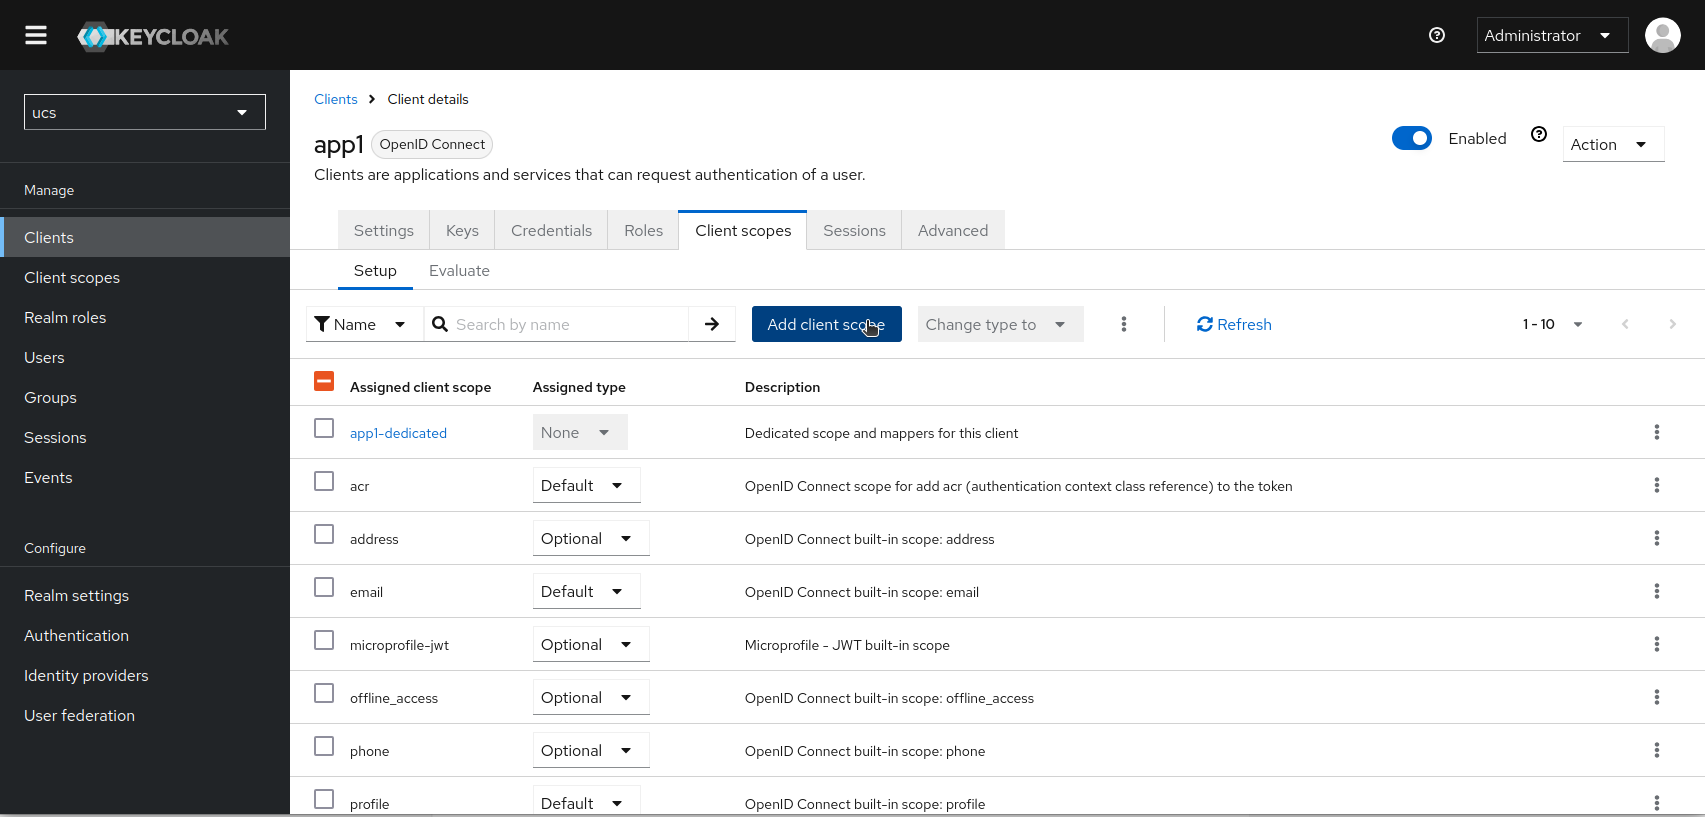
Switch to “Clients” in the left-hand navigation, select your client application there and switch to the client-specific “Client Scopes” tab.
There you can add a new client scope by clicking on “Add Client Scope”.
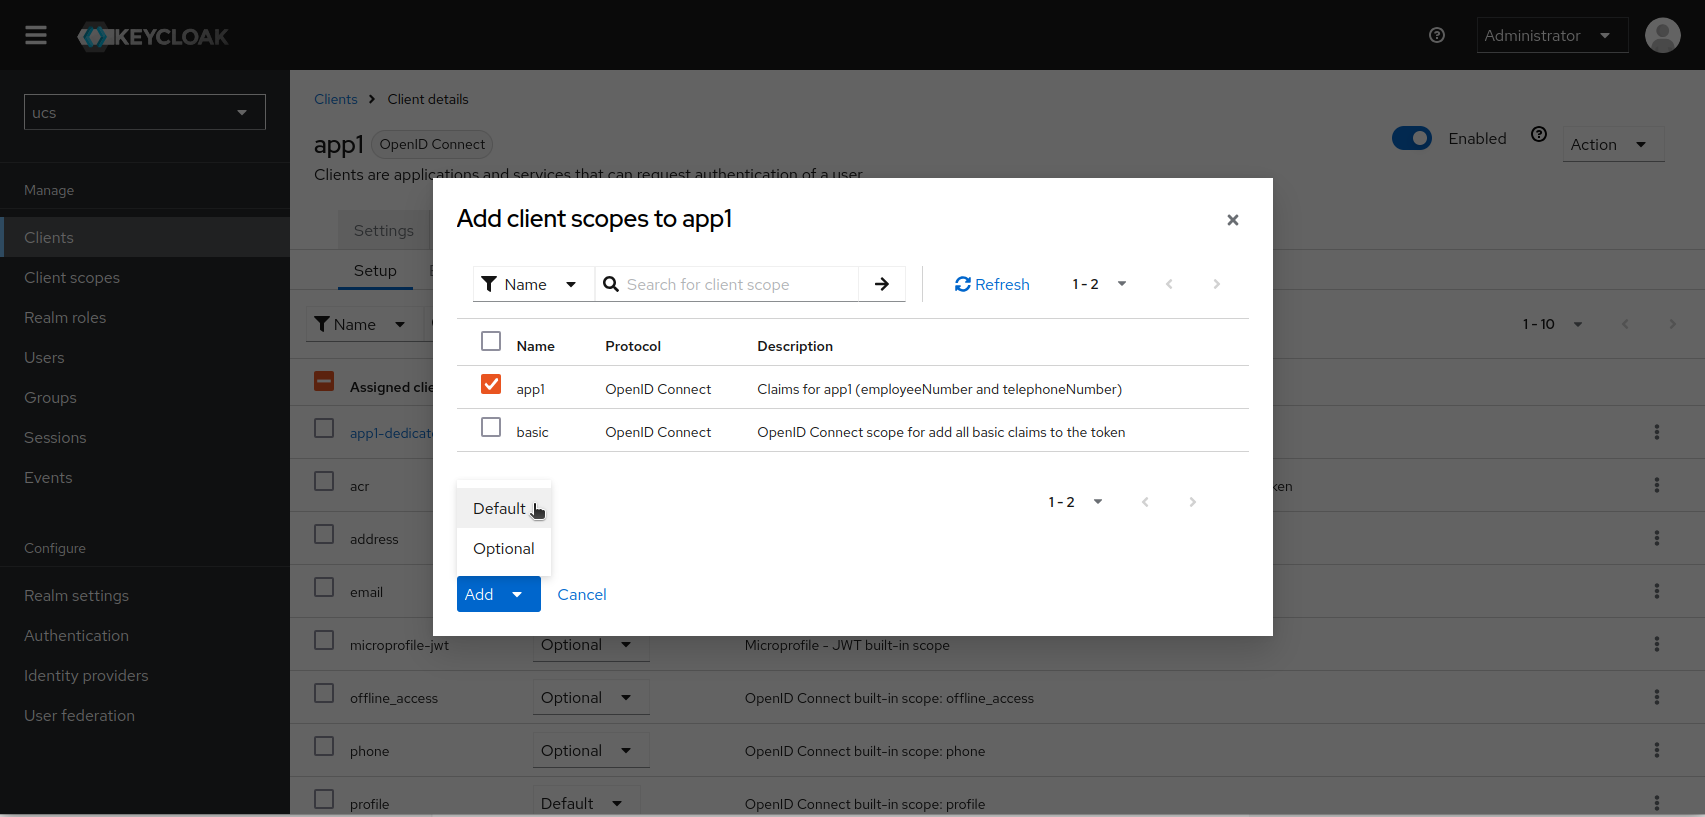
When adding a new scope, you will be offered the scope you just created for selection. Set a check mark. Instead of a Save button, you will see a selection button labeled “Add”. Select the conditions under which the scope “app1” should be transferred to this specific client application. As described above, choose between “always” (“Default”) and “only if requested in the authentication request” (“Optional”).
After saving, you can check what the access and ID tokens would look like. Go to the “Evaluate” sub-tab. Enter a user account and select it with the mouse.
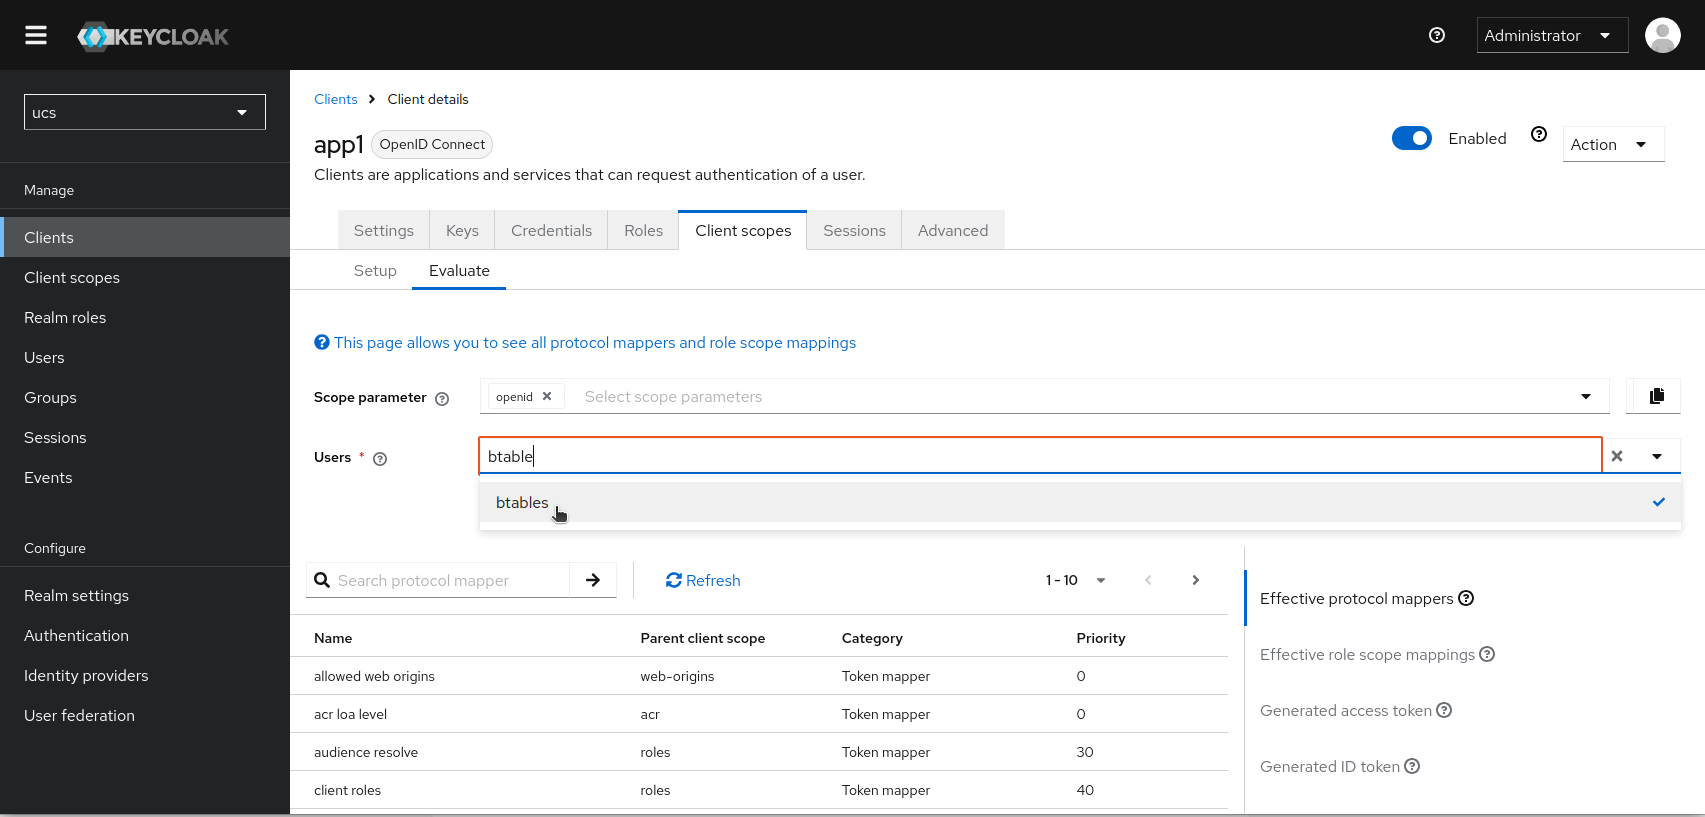
In the bottom right-hand area, you can then scroll through the tokens and check whether the scope resp. the individual claims are included.
