How to Configure Kopano shared folder
Environment
An UCS system with Kopano installation. You may want to establish a shared folder f.e. info@my.company with read access for a bulk of users and f.e. 2 users to answer from that address.
Step 1: Setting up shared folder user in LDAP
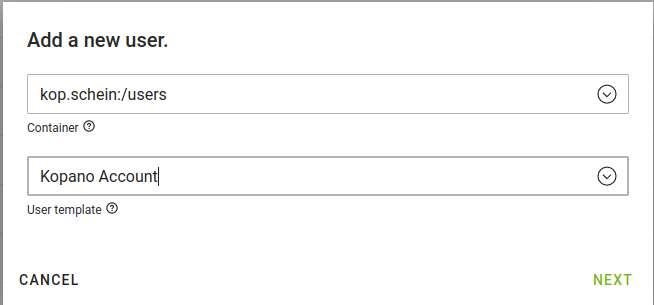
Open UMC -> Users -> User and click Add. Choose Kopano User:
Configure the new User. The user needs a Primary email address:
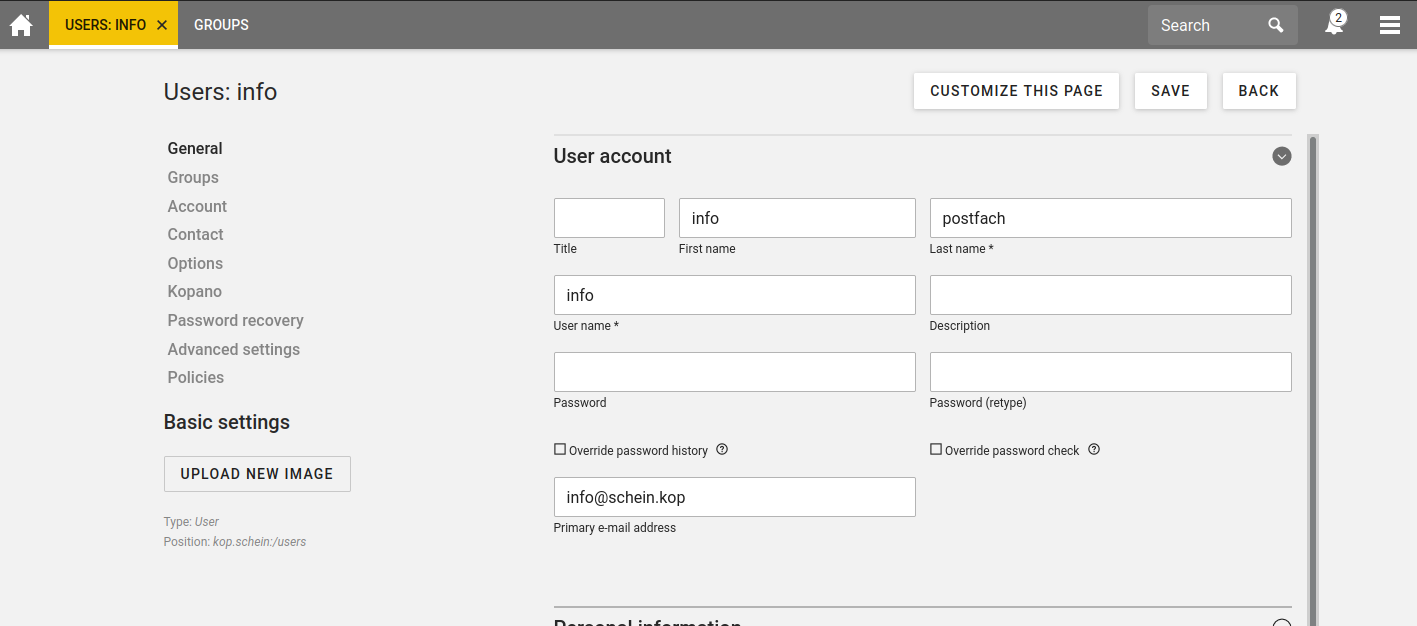
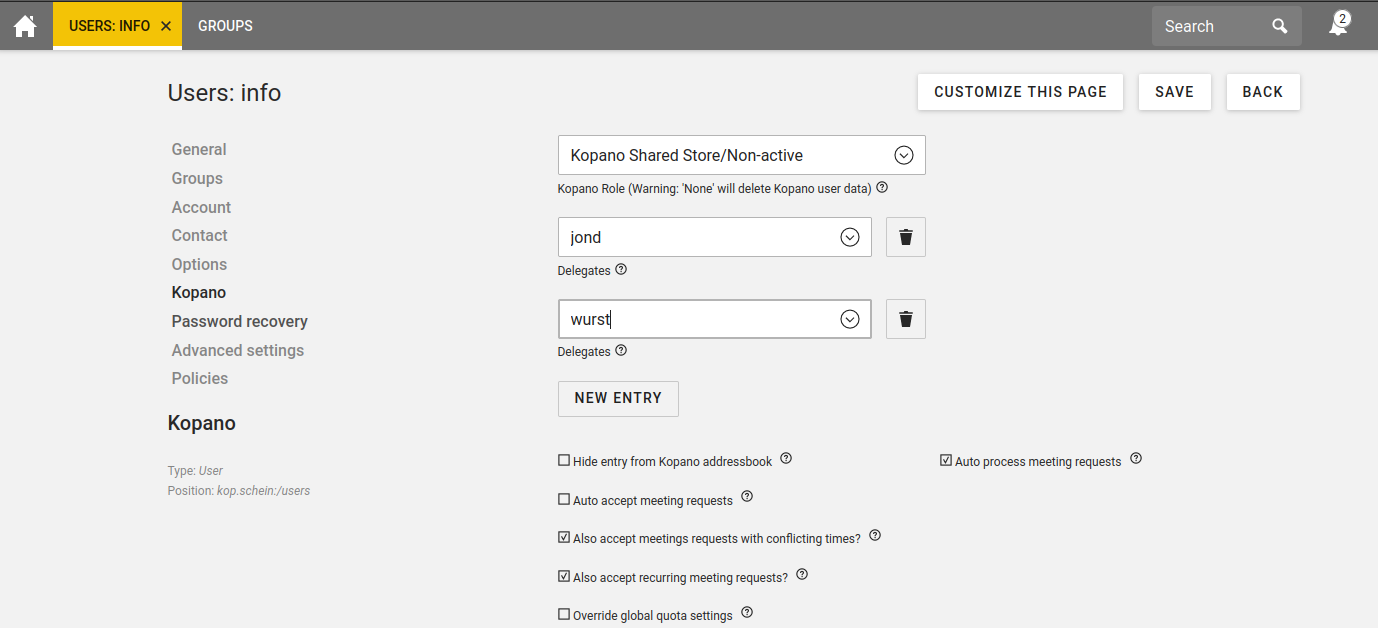
And a shared folder is not a active user. Also set all users, that should be able to write from that address as a delegate:
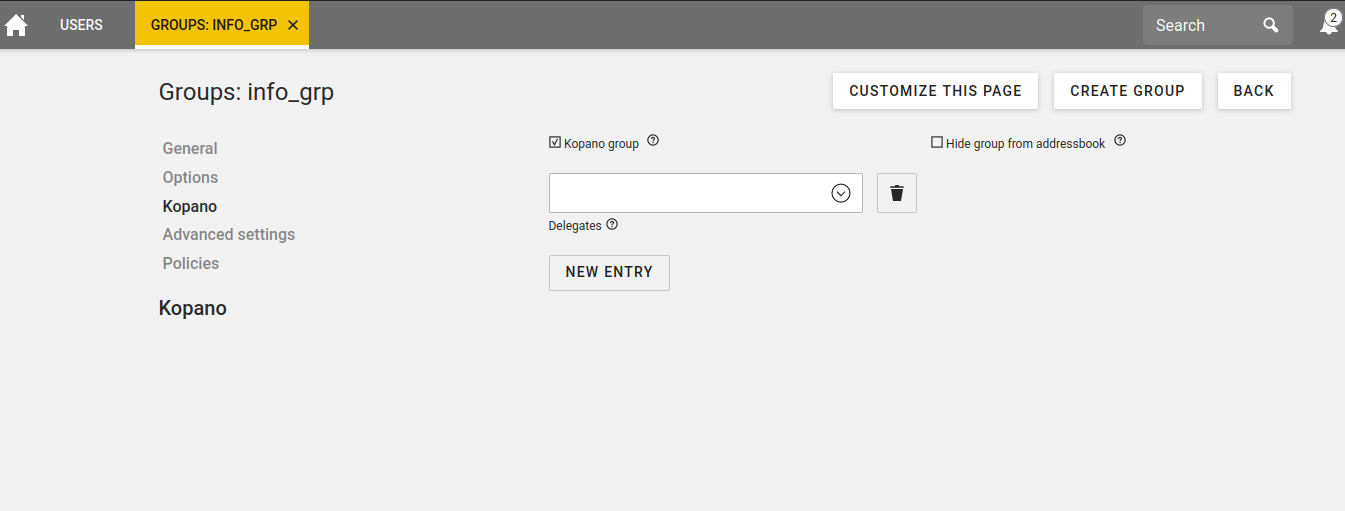
Step 2: Create a group that contains users with read access
To easily grant access for users to the shared folder create a group and configure all users, that should be able to use the folder, as member:
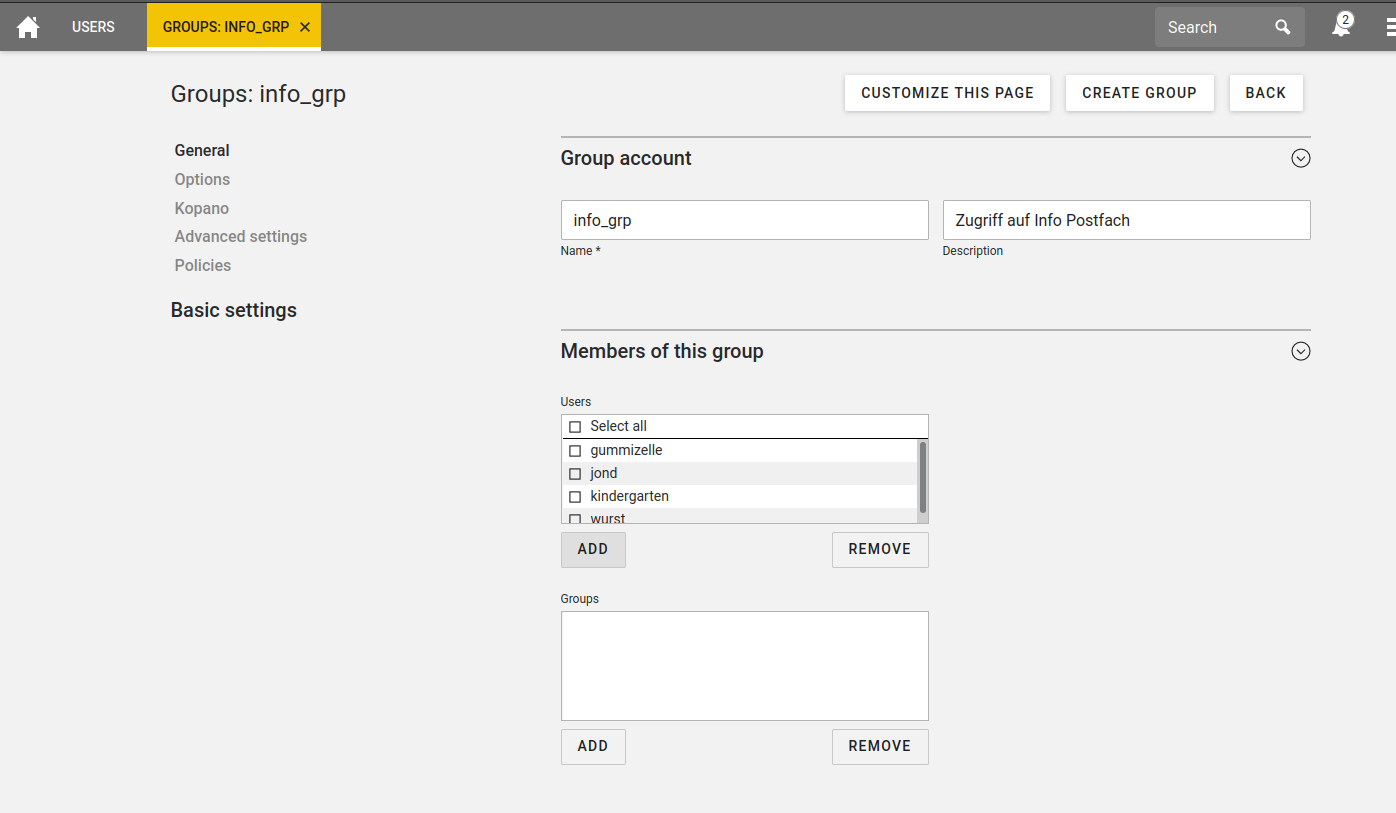
Activate the Kopano group checkbox on the tab Kopano:
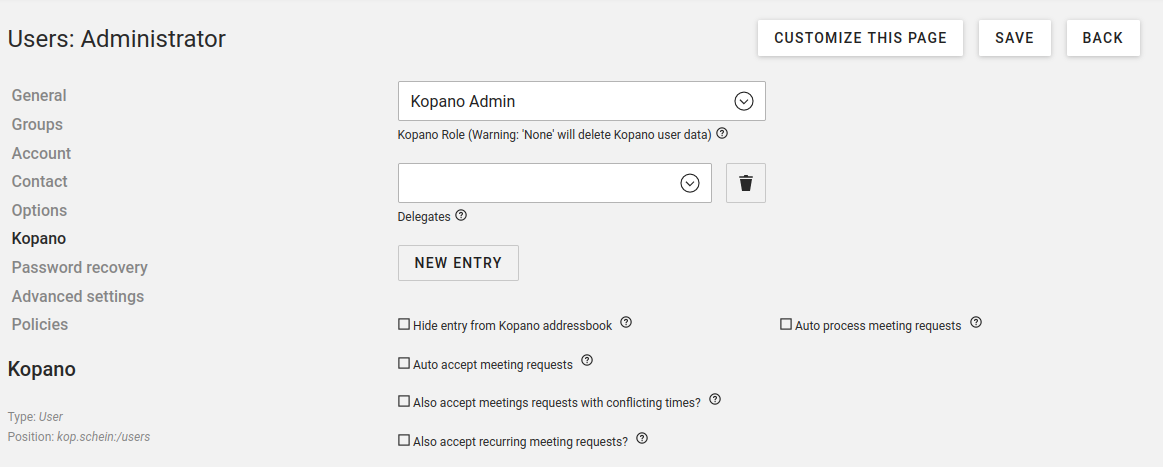
Step 3: Identify or configure a Kopano Admin
To set access rights to the group, you need to login to Kopano Webapp with a Kopano Admin Account. You can identify or configure an account in UMC -> Users -> user -> Edit user Account on the Kopano tab by choosing the corresponding role:
Step 4: Configure rights in Kopano Webapp
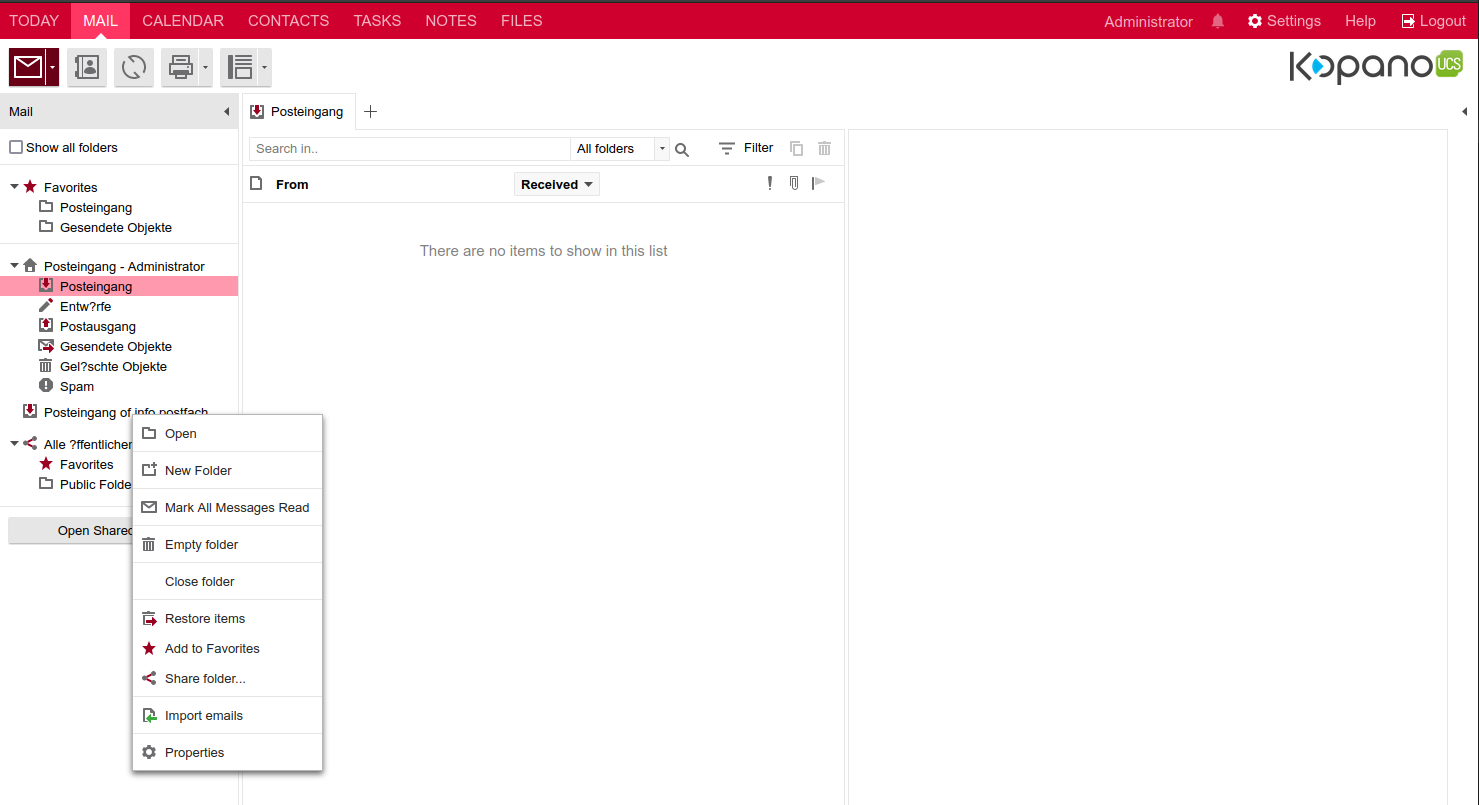
Log into Kopano webapp with an Useraccount that has the Kopano role Kopano-Admin click open shared mails and choose the one you want to share. Now you need to right click the new Inbox and click on properties:
Add the group an configure the rights as profile Secretary:

Now the users of the group can view the mails and the users, that are configured as delegate can write from that address.